


Andy Warhol brought bold colors, repeated portraits, and commercial flair into the world of fine art. This project is part digital design, part traditional art, and a whole lot of fun.
Whether you’re a teacher, student, or just looking for a creative weekend activity, this project lets you mix digital tools with hands-on coloring for a bright, personalized masterpiece.
Materials:
- Canva or other editing software
- Printer
- Cardstock
- Markers, Colored Pencils, or watercolors
Step 1: Take a Selfie
Choose a well-lit, front-facing photo of yourself. Keep the background simple—this will help with the editing process. You’ll be turning it into a black-and-white outline for coloring.
Disclaimer, if you are an elementary or SPED teacher, you will most likely have to be the one to do all the editing requiring a lot of prep for this project. I did this for about 15 students. Once you do one, the rest are a copy and plug in. If you are doing this with older students, they can handle executing the editing steps.

Step 2: Create a New Design in Canva
- Open Canva.com and create a square design (try 6×6 inches, depending on how big you want to print).
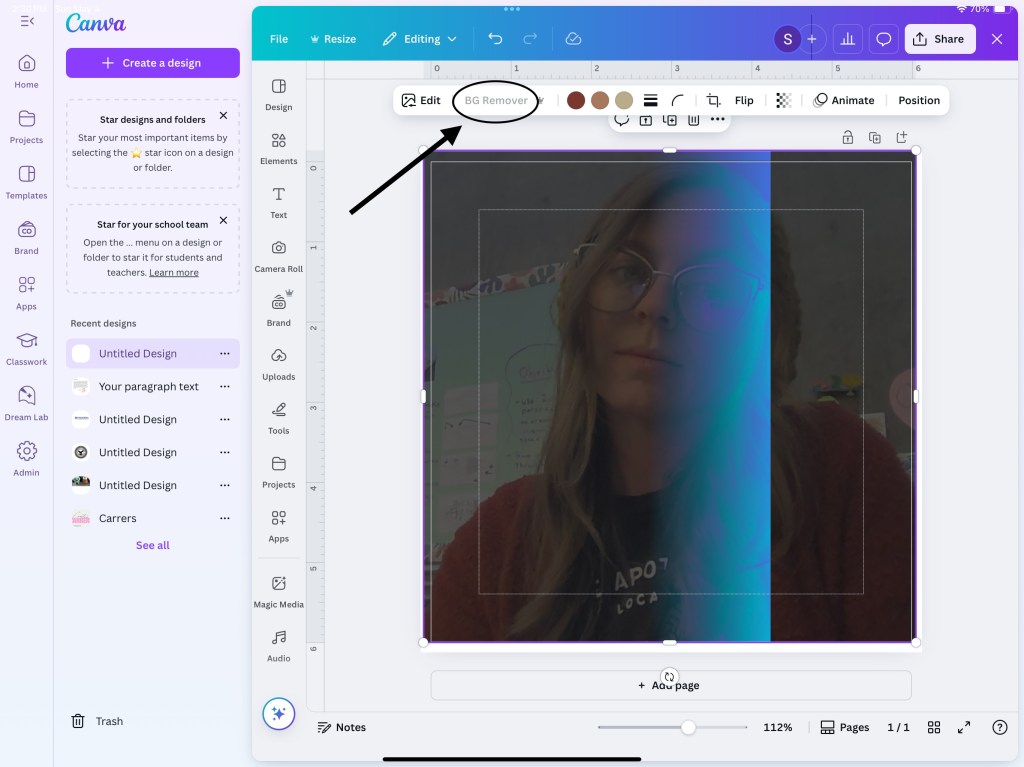
- Upload your selfie and place it in the center of the canvas.
- Using the background remover tool, erase your background so you just have your image. If you do not have a paid subscription, this tool is not offered to you. Instead, take a picture in front of a blank wall so you do not have to erase the background.

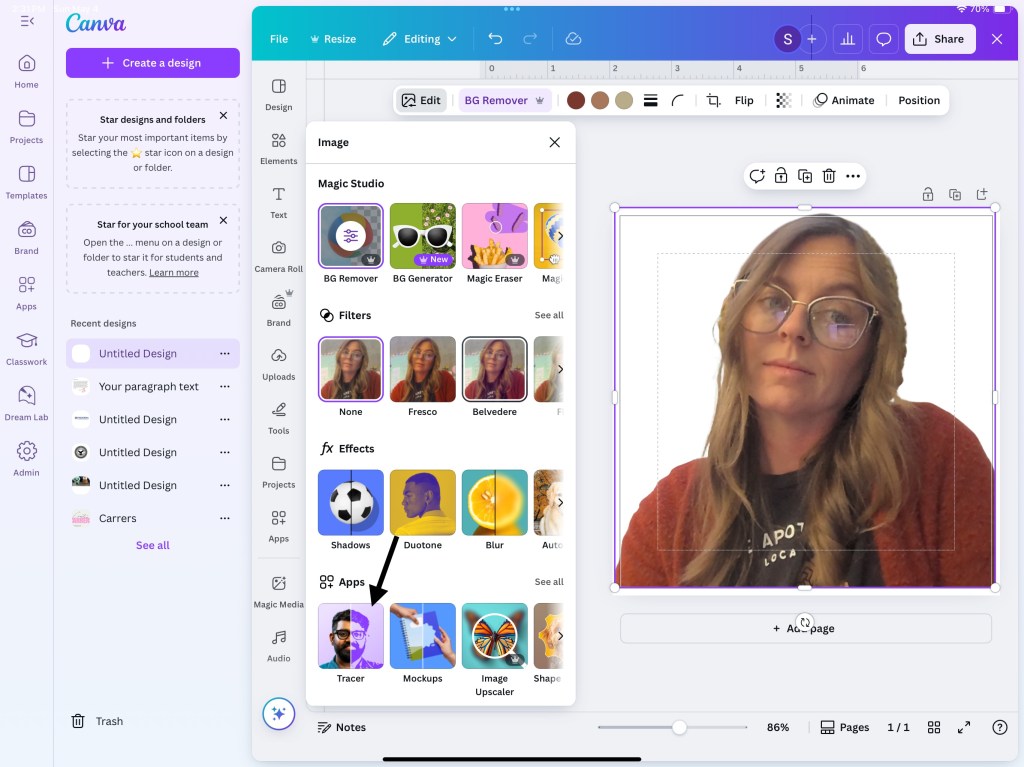
Step 3: Apply the Tracer Effect
- Select your uploaded photo.
- Go to Edit Photo > Effects > Tracer.
- Choose Open and adjust the threshold until you get the effect you want.
- Add to the design and delete the original picture
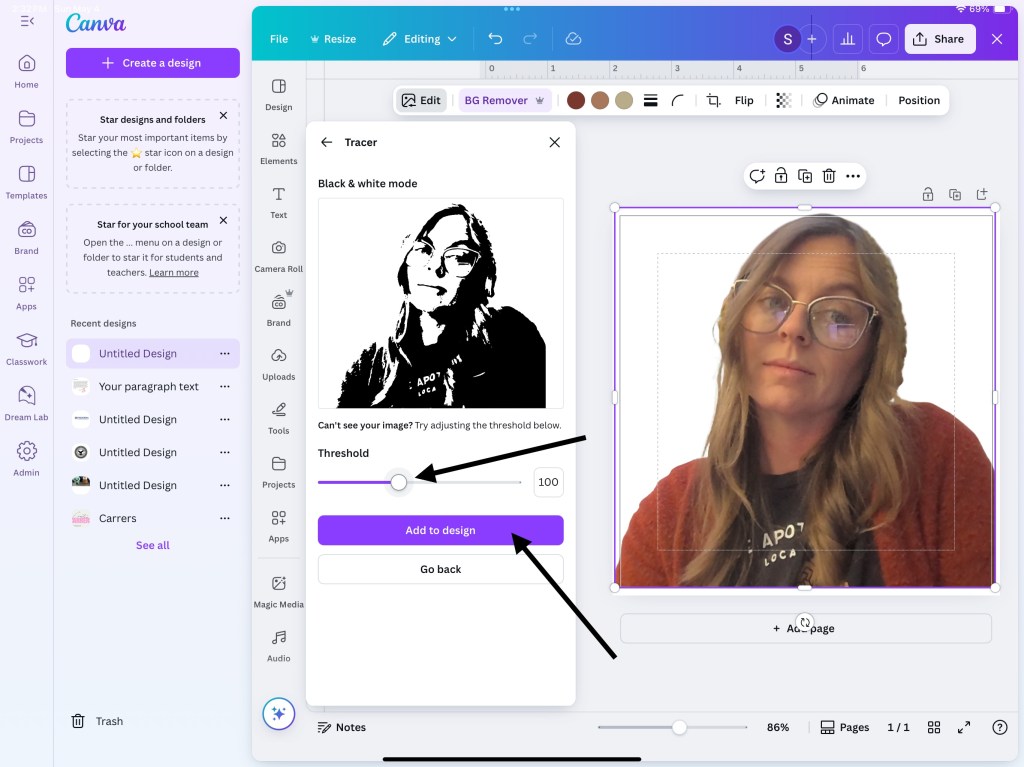
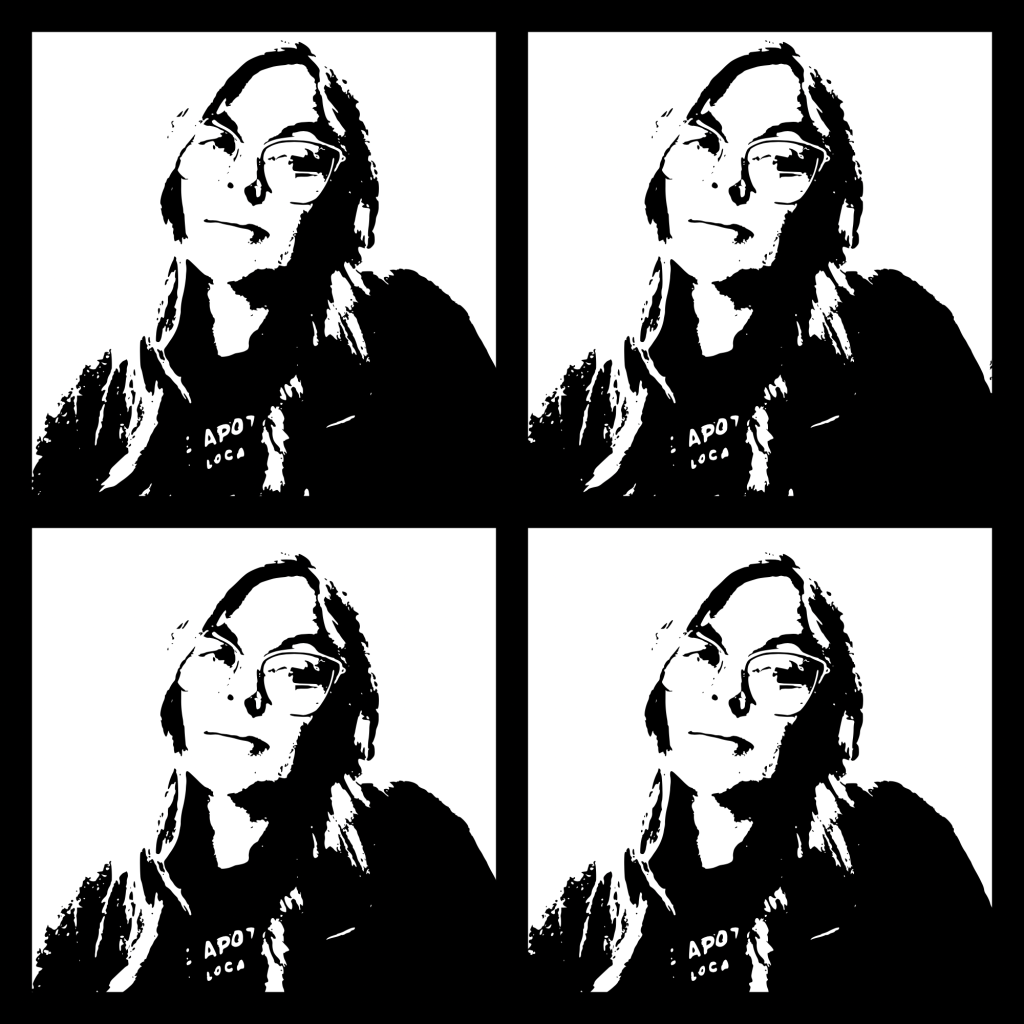
You’re aiming for a black-line version that looks like a stencil.
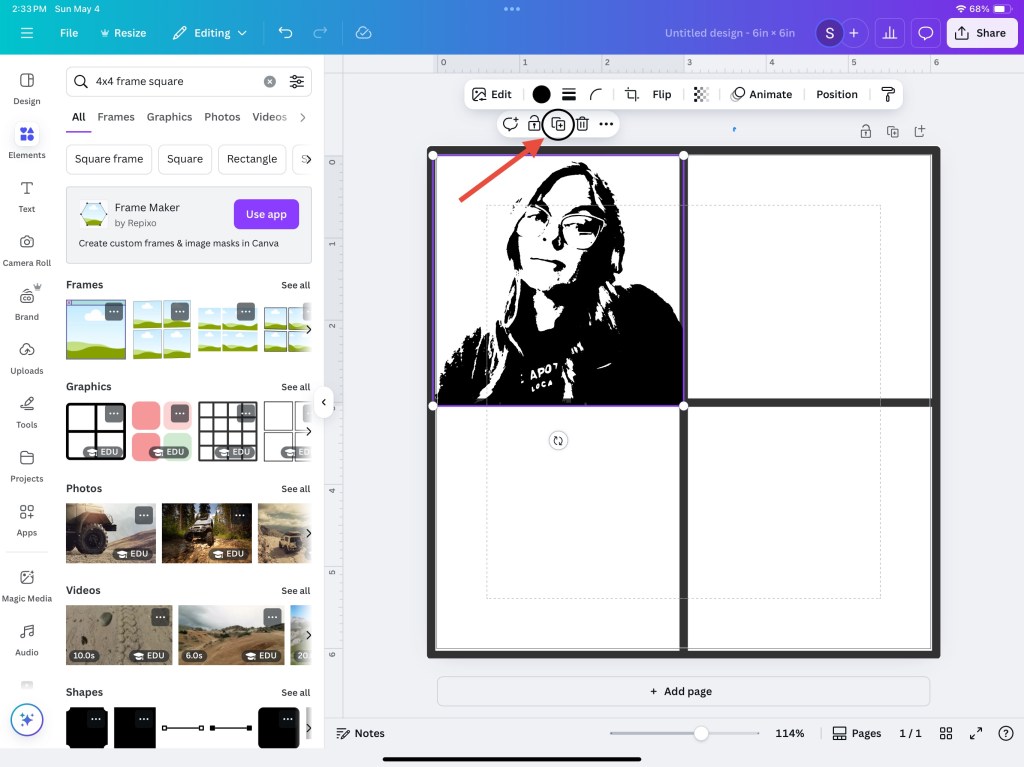
Step 4: Make a Grid
To resemble Warhol’s famous repeated portraits, duplicate your traced portrait and arrange it in a 3×3 grid or more depending on your intended final image. Each square will be colored differently once printed—just like Warhol’s multi-version prints.
Leave the outlines black and white for now—no digital color needed.

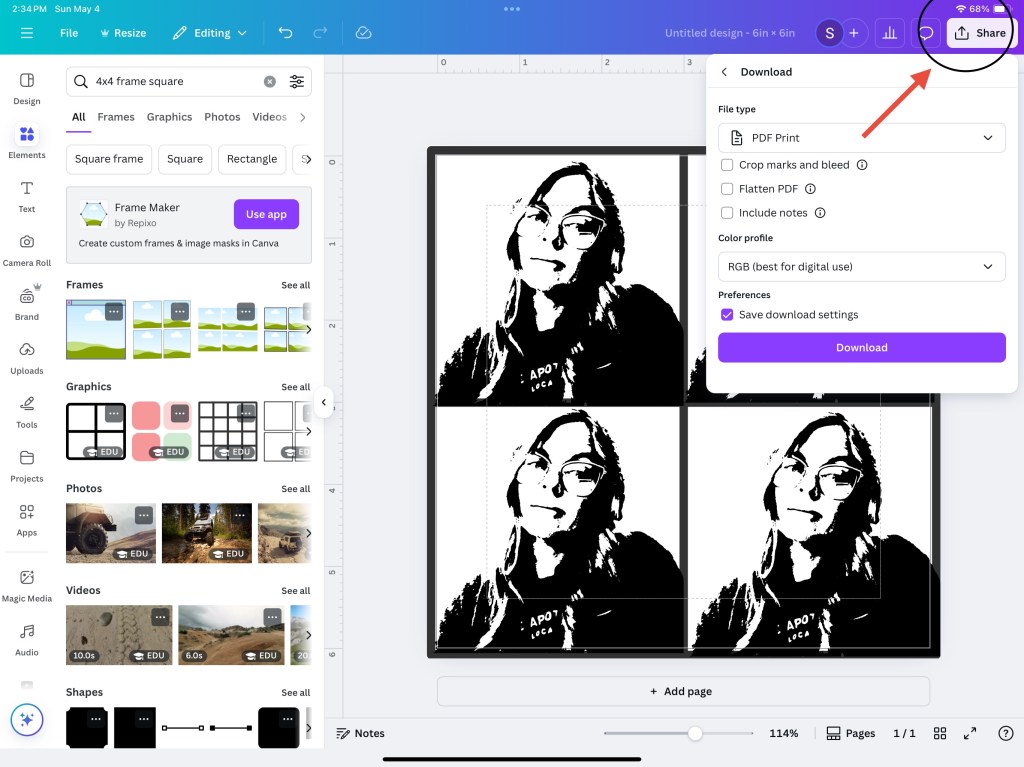
Step 5: Download and Print
Download your design as a PDF (for print) or high-resolution PNG, and print it out on plain white paper or cardstock.
Tip: Use thicker paper if you’re planning to color with markers to avoid bleed-through.
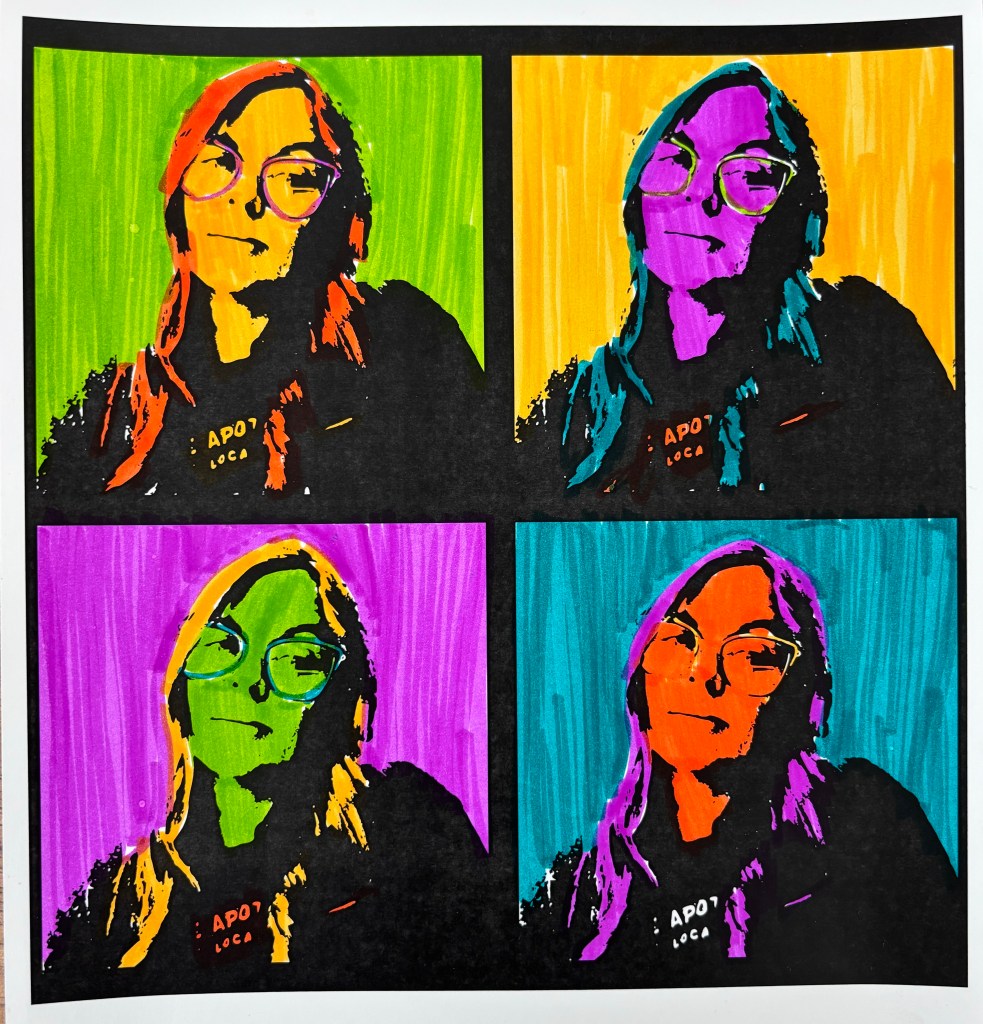
Step 6: Color by Hand
Grab your markers, colored pencils, or even watercolors, and start coloring each square in a bold, unique way. Think neon pink hair, green skin, purple backgrounds—Warhol loved breaking the rules of realism.
You can:
- Use the same colors in different placements
- Make one version totally warm colors, another cool
- Try complementary color schemes in each panel
For my example, I chose 4 different colors and changed how I used them in each section. Whatever option you choose, no two will look alike.
Final Thoughts
This project is a fun mashup of digital and traditional art, and it’s great for all ages. It introduces concepts like color theory, repetition in art, and art history Andy —all while giving you a fun, personalized piece of pop art.
Try it at home, in the classroom, or as a creative gift idea. All you need is a photo, a Canva account, a printer, and a set of markers.
