

At the start of the year, I like to discuss the elements of art with my classes. Some students may be very knowledgeable about this already, especially if they have already had me a past year. I believe that a refresher is always valuable as well as solidifying the knowledge for when they go off the high school. This year I created three different line projects for my different grade level classes, 6-8th. Sixth grade learned about using line creatively with a Chris Piascik Doodle Drawing lesson, seventh completed a line variation lesson with the use of zentangles, and 8th grade completed one of my most favorite lesson of blind, continuous contour drawings.

Pre-Activity
I have two reasons this is my favorite lesson. One, blind drawings do not come out looking perfect. I always have one student who starts off struggling with the project due to wanting the work to look exactly like the subject. This forces them out of that mindset. I tell them early on that these artworks will not necessarily look pretty, but they will look interesting.
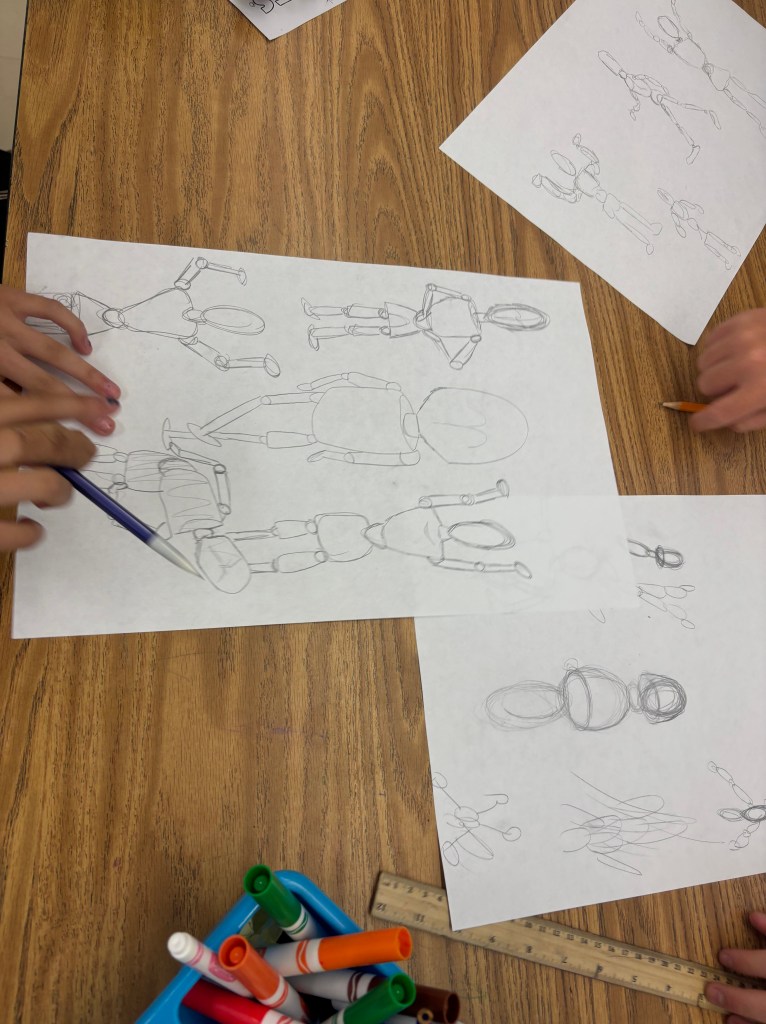
The second reason is because of the pre-activity I have the students finish before the actual lesson. For the]is activity, I have drawing mannequins on the table. I have also done this with partners drawing each other so you do not necessarily need mannequins if you do not have them. I start by giving them five minutes to draw the contour of the mannequin. If they have time, I have them add shading or detail. Then I slowly reduce the amount of time.
- 5 minutes
- 3 minutes
- 2 minutes
- 1 minute
- 30 seconds
- 20 seconds
- 10 seconds
- 5 seconds (I do this one a few times)
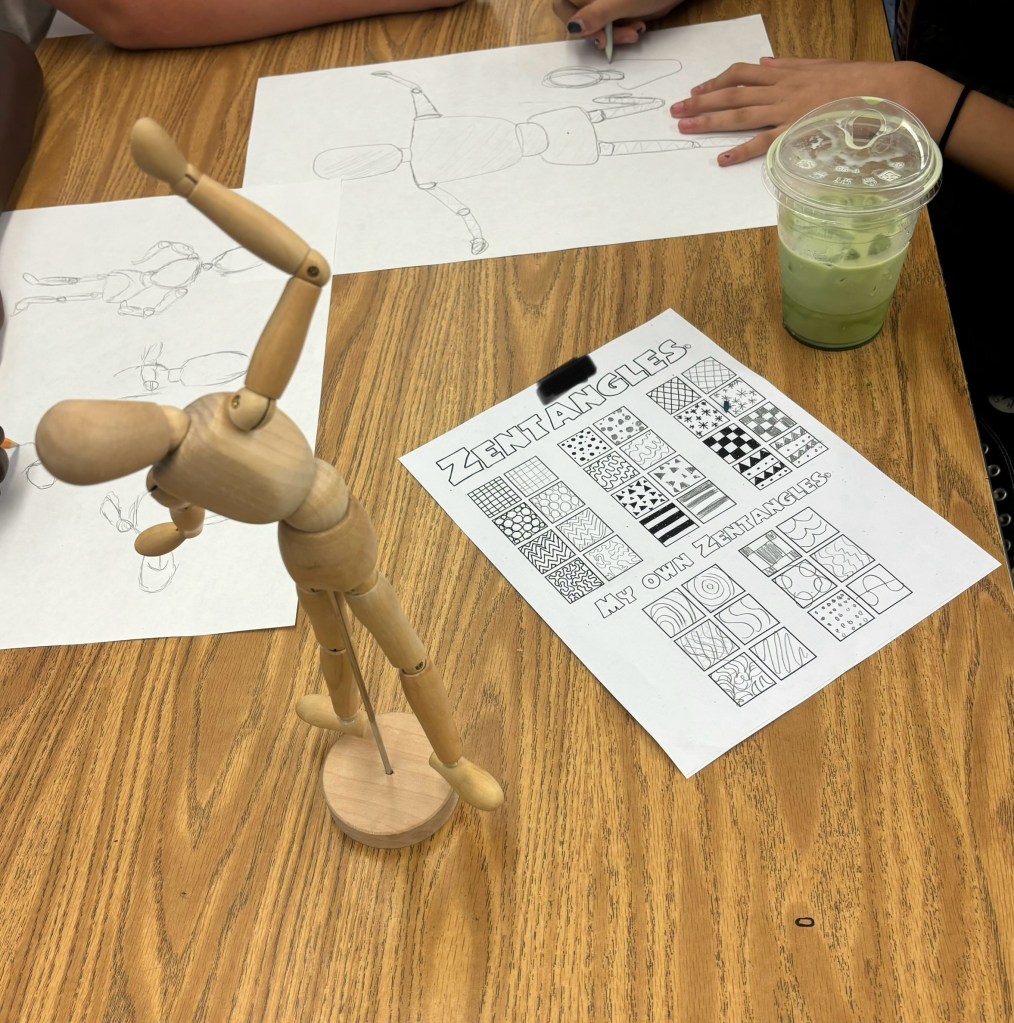
The amount of commotion you hear as you reduced the time to seconds always makes me laugh. After they finish all rounds, I ask “Why do you think we do this lesson? Do you think I just enjoy torturing you?” Which they all yell yes too. Also makes me laugh. But they eventually come to the conclusion that it forces them to see the most important parts. This realization is what helps with their final artwork.
Materials
- large paper
- an object or two to use for their object study
- pencil
- sharpies
- erasers
- markers
- mannequins
- mirrors (if doing self portraits)

Steps
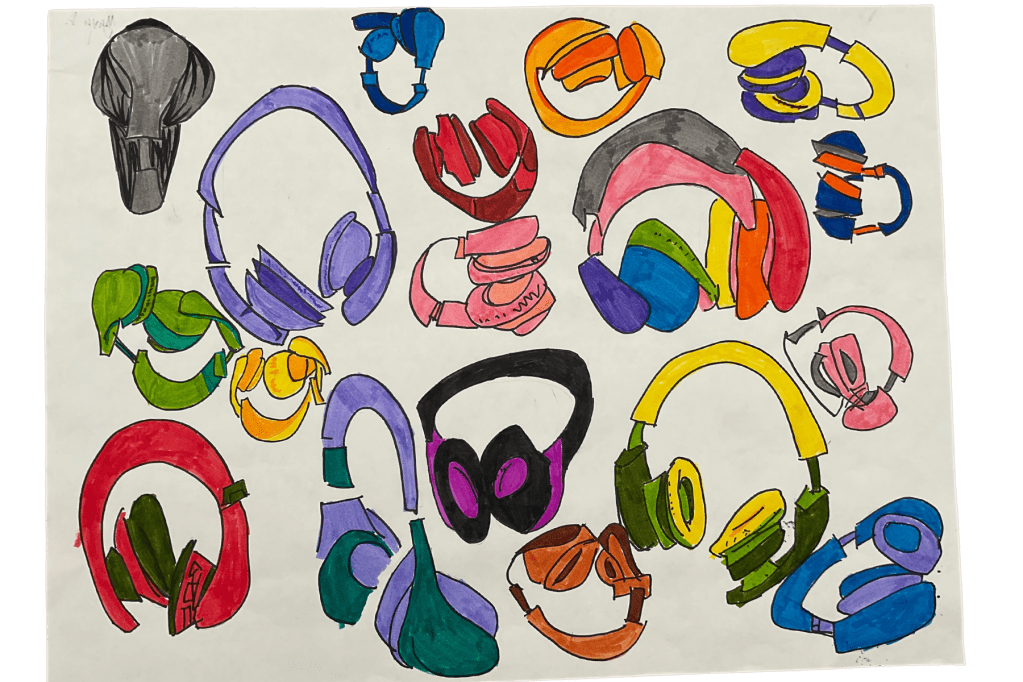
- Place object in front of the student and start to draw somewhere on the paper without looking at the paper or lifting their pencil.
- Rotate the paper and start again changing the position of the object to get a different angle.
- Continue to rotate, reposition, and draw until you filled the space and created an interesting composition. (It is encourage to overlap)
- When the drawing is finished, trace with sharpie and erase the pencil marks.
- Add color with markers. Color can be added abstractly or true to the object. The whole image does not need to be colored as well.

Accommodations and Variations
I have done this projects with students as young as 5th grade to 12th. It is easily adaptable to the different grade levels as well as can be done in various variations. I started doing this project with self portraits but recently moved to object study to get a variety of different artworks rather than a lot that looked similar. I think this variation added to the overall lesson and showed me a lot about the individual students as well.
As an Amazon Associate, I make a small commission on product links I recommend.
