This year I had the opportunity to teach special education students in my art class. At first, it was a struggle to find art lessons that were beneficial, substantial, or helped develop motor skills and creativity. Many of the resources I found focused more on the process, which being also valuable, I really wanted projects that they felt proud to take home and display. After many searches coming up with lessons that felt lacking, I began to develop my own through the arsenals of lessons that I have taught over the years.
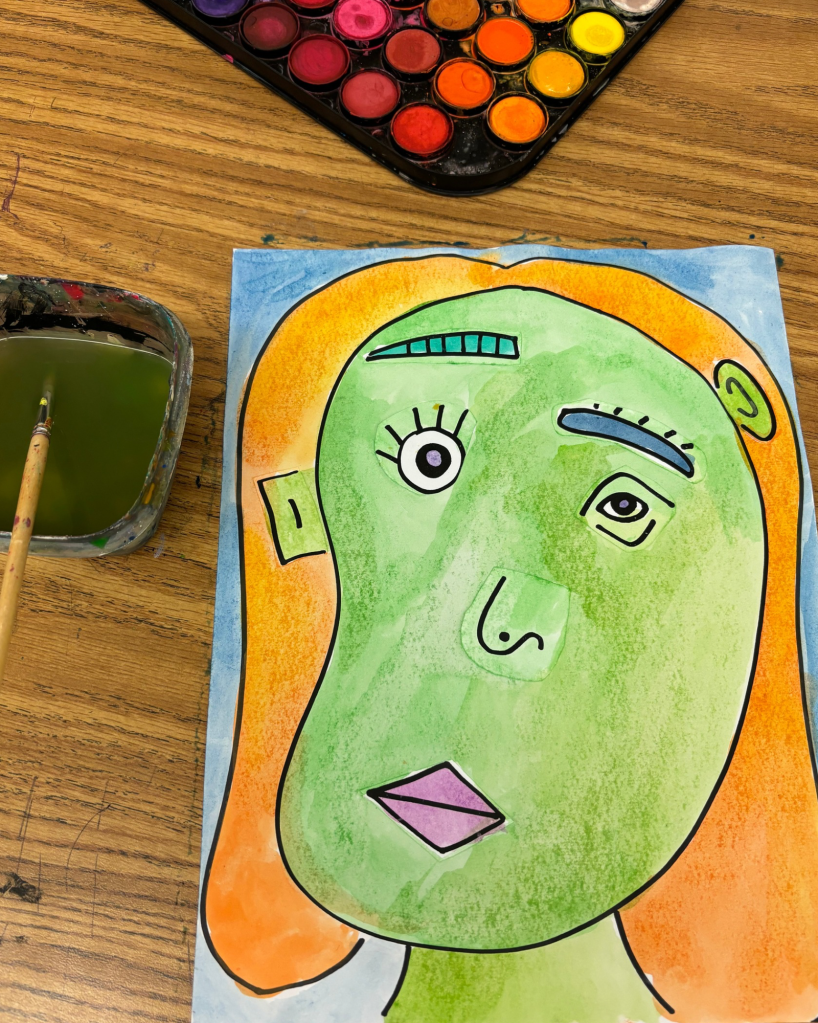
For these portraits, I used Picasso as inspiration. I use Picasso frequently when teaching younger students for I like to emphasize not needing things to look perfect. The goal is to make a portrait that emphasizes the abstract principles while also developing creativity, motor skills with cutting and gluing, and art skills through coloring.
Materials:
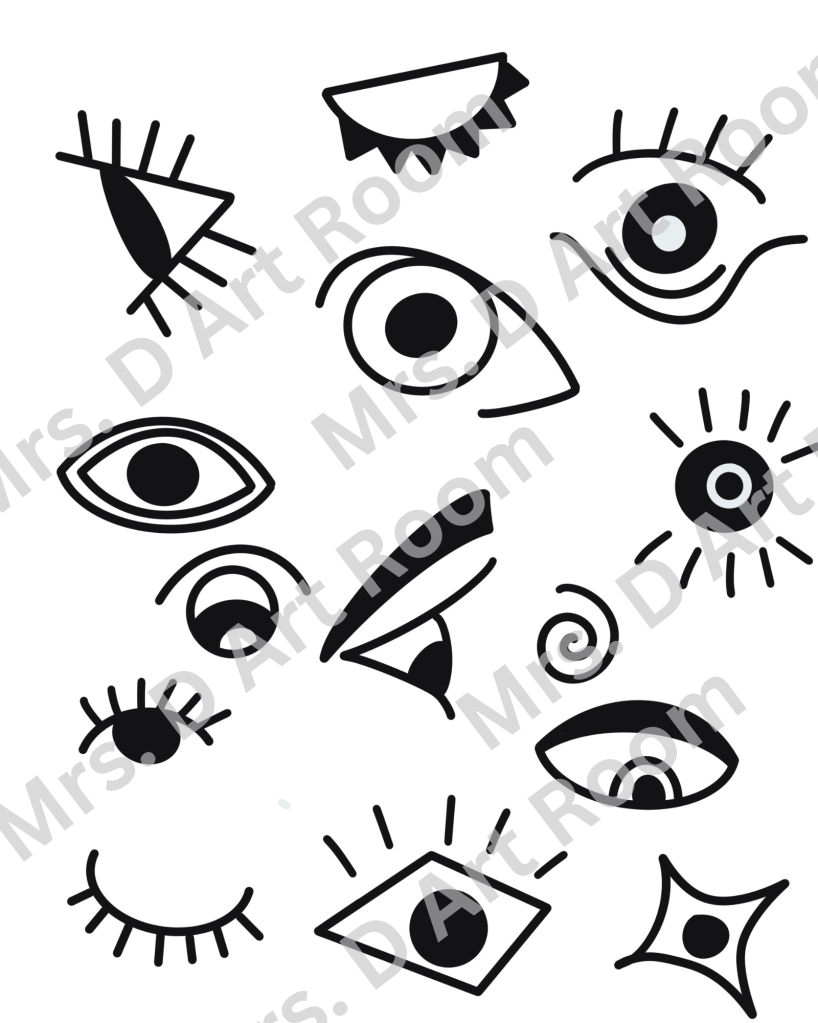
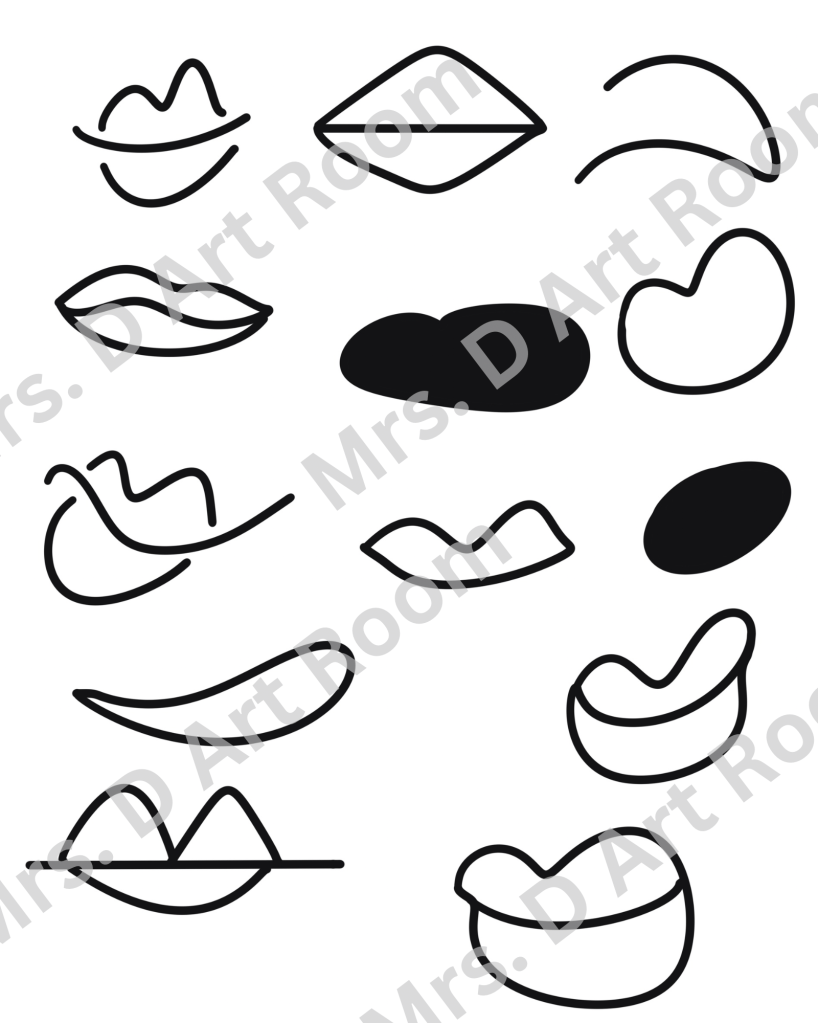
- Picasso Face printable (click on the hyperlink to download the PDF for free on my resources page)
- Scissors
- Glue
- Heavy paper
- Photocopier
- Coloring materials (I used watercolors)
Steps
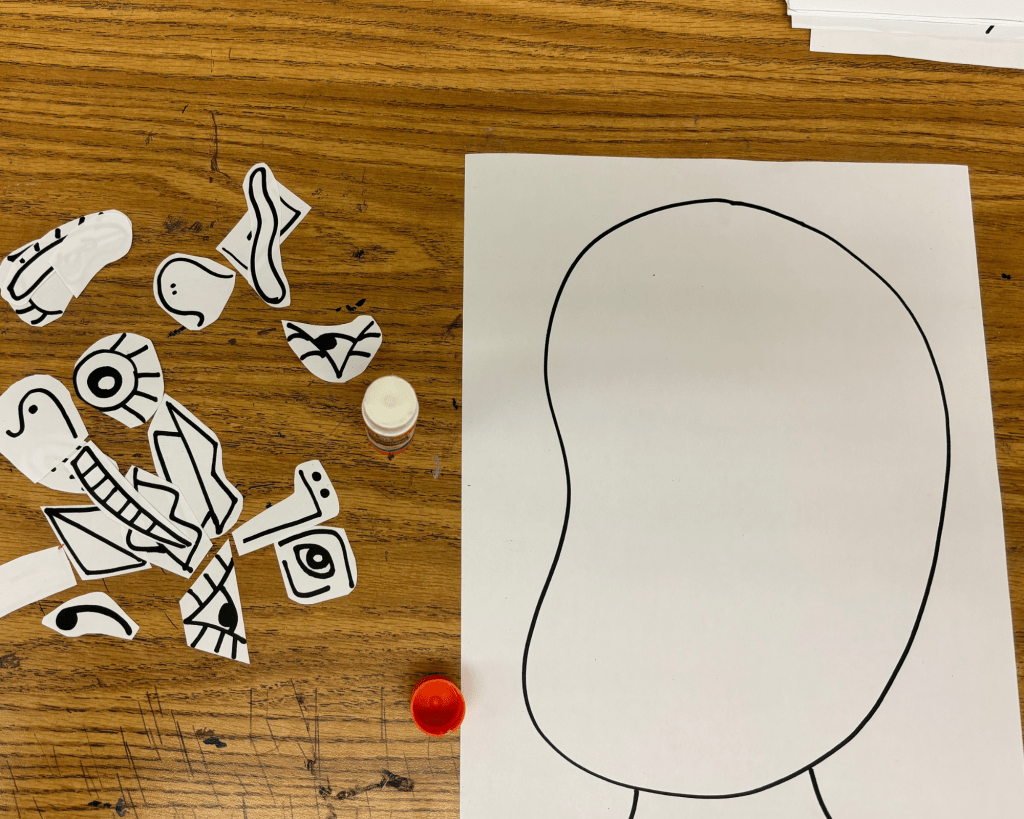
- Print out the PDF provided on the resource page. There are four face templates and 4 pages of facial features. You can print out however much you think you need to give your students choice.
- Discuss Picasso, abstract art, and use some of his abstract portraits as examples expectations of the lesson. I like to show Picasso’s portraits from when he was a child to when he was older showcasing how his work became more abstract as he got older and was actually a very skilled realistic artist.
- When the students begin the project, you can either have the pieces pre-cut, allow them to cut the pieces themselves, have an aid cut the shapes they want, or use the facial features sheet as a references for them to draw themselves. This step depends on the skill and motor skill level of your students.
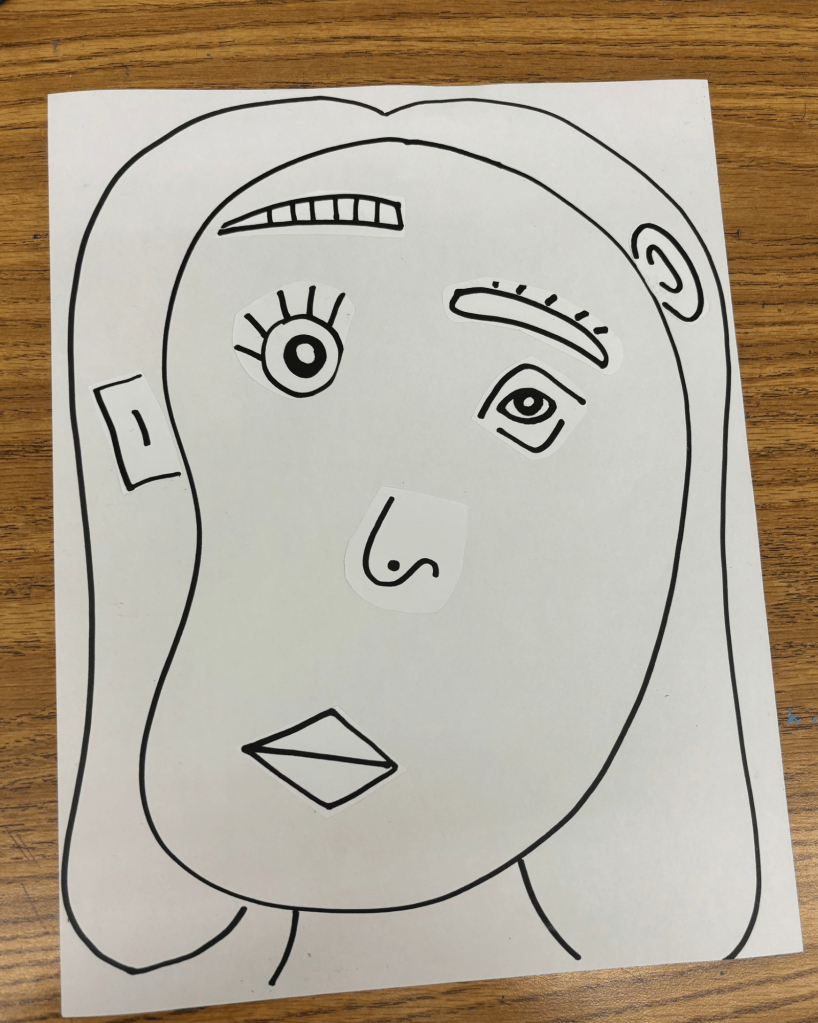
- As they finished, collect the work so that they can be photographed. This is a 2 day project, which I found to be perfect for my students attention allowing them the perfect amount of time to complete each step.
- Photocopy their portraits onto thicker paper. If you have the ability, photocopy onto watercolor if using the medium. Students can tear their paper with too much water even on thicker paper.
- Finish the artworks by coloring them in using watercolor, crayons, markers, etc. I really like using watercolor since it is a bit easier to use and fill large spaces.
Here are the examples of the PDF’s available at my shop and resources. This download can be adapted to many age ranges, skill levels, or classroom make up. I completed this particular project with SPED students, however, I can easily complete this with other classes. It is easily adaptable to a variety of students.
After completing the project, I was very happy with the results. My students enjoyed the choice aspect of the resources and got to practice their motor skills using scissors and glue. When they received their photocopies, they were eager to add color to their portrait. I would recommend printing out a few copies so they have the opportunity to restart if they choose. Displaying their completed work in the classroom and the art show added to their confidence as artist as well as adding an additional integration quality to the assignment.