

Introduction
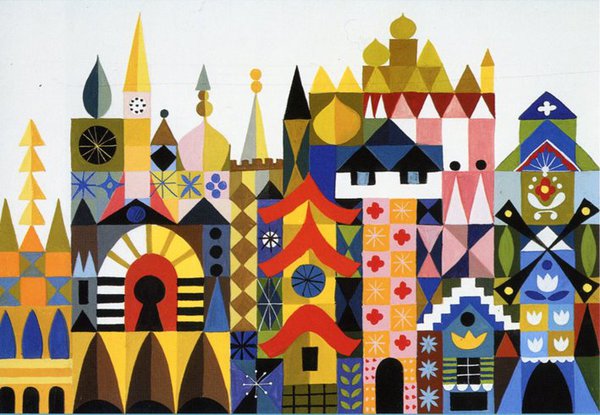
I love teaching the students about Mary Blair whenever we are learning about the element of arts. Specifically when it comes to shape. Even if you have not heard her name before, you have most certainly seen her work if you have watched a Disney movie or gone on It’s a Small World. A Disney animator and one of the few women in her field, Mary Blair brought whimsy, color, and shapes to her designs. Since many students have not heard of this artist before, I recommend watching the short video below. This is the video I usually show for it gives a lot of information and is short.
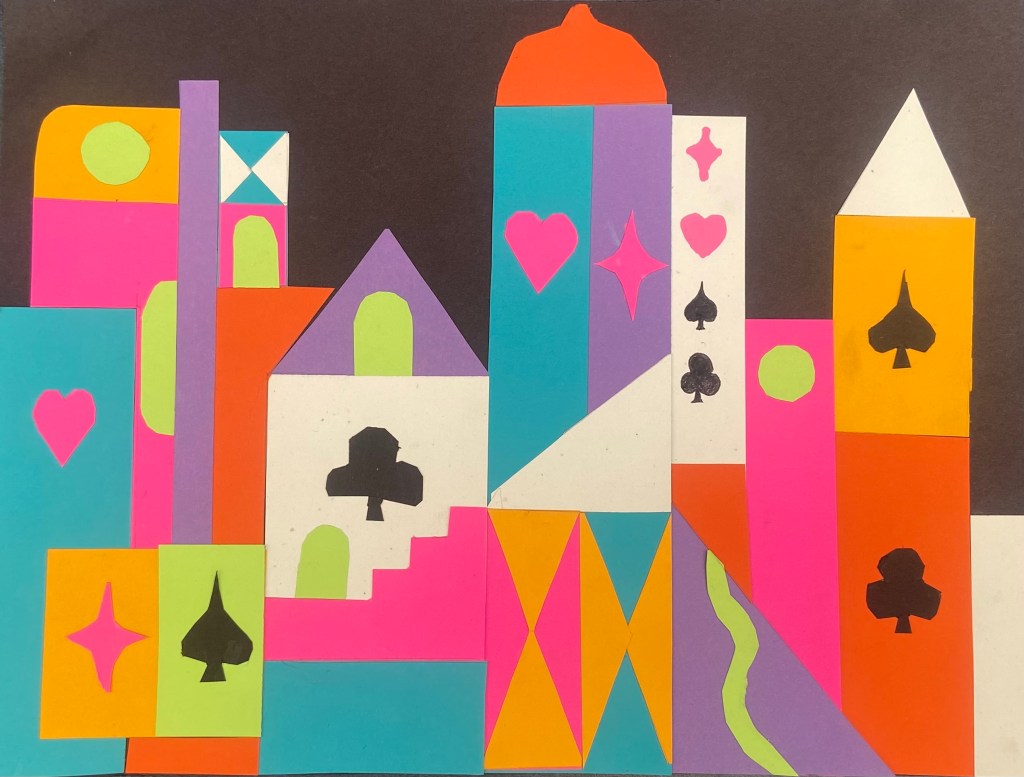
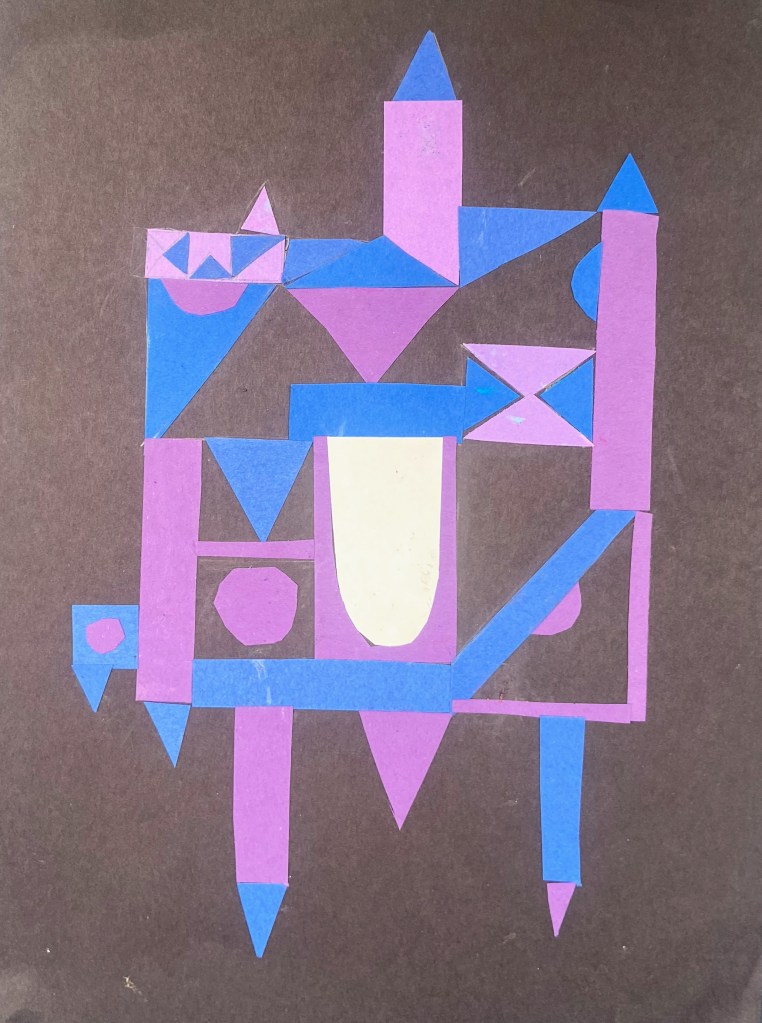
Once the students knowledge is activated, I move onto the activity of making Mary Blair inspired buildings. I have done this several ways. I have done it using collograph prints, construction paper, watercolor, or paint. Each medium gives the lesson its own challenges and technique focus. For this post, I am focusing on the paper cut lesson for it focuses more on shape rather than.


Materials
- Construction paper or card stock (I personally like astrobrights because they have a variety of colors and are vibrant)
- Scissors
- Glue Sticks or wet glue
- White or Black construction paper or card stock for background
Again, this lesson could be easily adapted to different materials depending on the goal of the lesson or age group.
Steps
- Begin this lesson by discussing Mary Blair and shapes, both organic and geometric. Blair uses a mix of both shapes, which makes her the perfect inspiration for a shape lesson.
- Once the students have an understanding of shapes and the style of Mary Blair, have them complete a rough draft of their inspired buildings. Rough drafts do not need to be colored or perfect for this part of the process.
- When rough drafts have been approved, they can begin collecting their supplies for the activity. I highly recommend they use a ruler to help make their final products look neat and clean.
- Students are to glue the back of their cut out pieces rather than the paper they are gluing to i]to avoid unwanted glue residue. They will also start with the larger shapes first and add the details toward the end.

Honest Feedback
I always do an end of the year survey with my students about projects that have been completed. I currently teach middle school and I had a few students say that they did not like this lesson because it was a bit “baby-ish”. I completed this activity with an 8th grade class, but may recommend it for 6th grade or younger. Since it requires a lot of cutting, lower elementary also might not be as successful. With that information, I also still see the value in completing it with older students because they are capable of pushing their ideas further.
As an Amazon Associate, I receive a small commission on purchases made through the links on this website.
