

This was one of my favorite lessons I completed during my first year teaching printmaking. The process was rather easy for the students to complete and the results were overall successful. After a few difficult activities and “failures” with project executions, it was great to have a project that came out well. The best part of the project is that no ink is involved. There is still a level of messiness with cutting cardboard and gluing, but not nearly as much with the printing ink, which is a win for me.
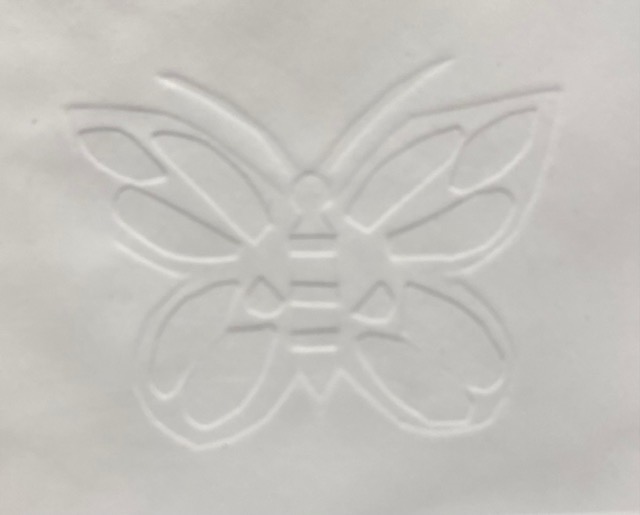
Embossing: creating a raised image on a surface (paper, card, etc)
Materials:
- Thin cardboard (cereal and other snack boxes work great, but can also order thin cardboard sheets on Amazon)
- scissors or exacto knives
- cutting mats (if using exacto knives)
- glue
- printing press (you can do this project without it using a wooden dowel to smooth the edges into the paper, however, it can be really difficult. If you are doing several printmaking projects, I recommend d]getting a press because it makes life easier. I use this one fromAmazon that is great and was super reasonably priced)
Steps
- Present the lesson and complete a demonstration for your students. I usually do this love, but also create a video for students to watch for a refresher or for when they are late or absent. Creating videos has reduced the amount of times I have to research a lesson, allowing me to focus on students working rather than students who were absent or late)
- Complete rough draft: the project focus can be of your choosing. I gave my students full creative freedom on the subject, but you can narrow down the subject or criteria to fit a theme for your own class.
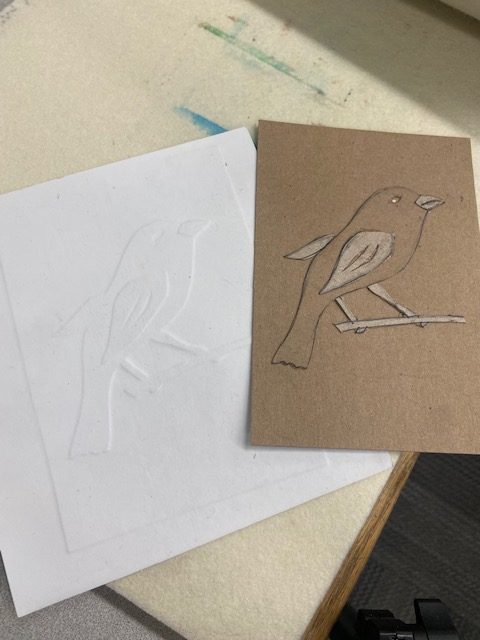
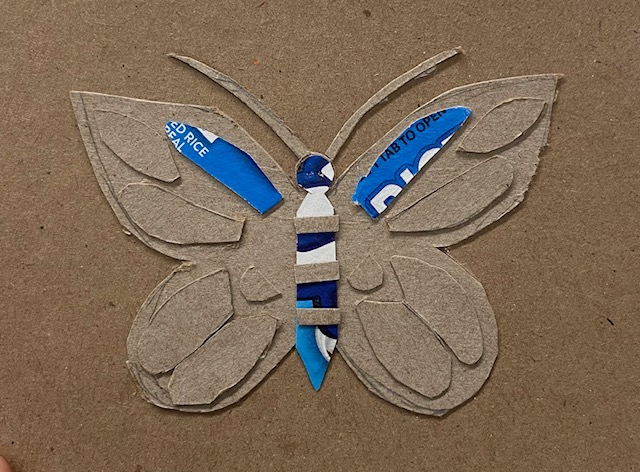
- Create the plate: using thin cardboard or old cereal boxes, the students create the image using at least three layers. The plate itself is layer one, so the eye of my bird in the example below is actually layer one because I cut away from layer 2, which is the actual bird. Layer 3 is the bird wing and the beak because it sits on top of the bird. Give your students one piece of cardboard for the plate and another to cut from. I think using exacto knives is easier for making cleaner plates, but does have the danger of injuring a student.
- Run the plate: get the paper wet (I would run it under the faucet for a couple of seconds) and place on top of your plate that has a layer of plastic wrap. I also place a paper towel on top of the paper for safe measure. I run it back and forth at least two times to get the desired amount of pressure.
Pro Tips:
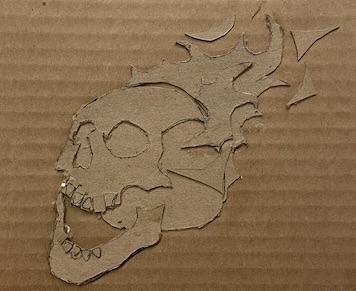
- Do not use regular cardboard. In my student example below of the skull, you can see lines that was created from the regular cardboard used for the printing plate. Chipboard works best for the plate for it doesn’t create those lines and reduces the thickness of the plate making it easier when running it through the press
- Wet the paper when printing and put plastic wrap on top of the plate. Without this step, the image will not press as well. Without the plastic wrap, the wet paper will also stick to the plate. Something I learned the hard way.
- When creating an image, you cannot place a piece of cardboard on two different layers. For example, I did a plate of an apple and created a leaf. I put the leaf on top of the apple (layer 2) and on part of the plate (layer 1). When it went through the press, you could see the outline of the apple through the leaf. In order to avoid this, every piece of cardboard must only be on one layer so I would have had to make layer 2 the outline of the apple AND the leaf and then added another leaf on top of that layer.
- Flatten the prints after they dry: the wet paper will cause the paper to curl. Wait till they dry to press them under heavy books to reduce the amount of curling.

Student Examples


Extension ideas: even though the final images came out great and were really visual e, you could also add a step to this assignment by having them print two images and color one using watercolor. I think colored pencils might ruin the raised lines, but watercolor wouldn’t cause that pressure.
