

A fun lesson I do with Kindergarten is talk about cave paintings and materials they would have used. I start this lesson by reading the book The Discovery of Lascaux . This book I had on my kindle and just projected to my board for the students to read. I luckily had an E-son board, but if you do can easily use an iPad or computer to read the book to your students. This book works great because it has a lot of great information that was age appropriate for Kinder.

After we finish the book, I like to ask my students, “How do you think they drew on the cave walls? Did they go to the store and buy paint and brushes?” That would always get a giggle and they would of course say no. So we would brainstorm some things that a cave person would have. Some of the answers would be coal from fires, berry juice, mud, clay, etc. We would then discuss what a cave person would draw and why? “Would they draw themselves driving a car to the mall?” Of course another round of no’s from the littles. So they would begin to brainstorm what a cave person’s day was like.
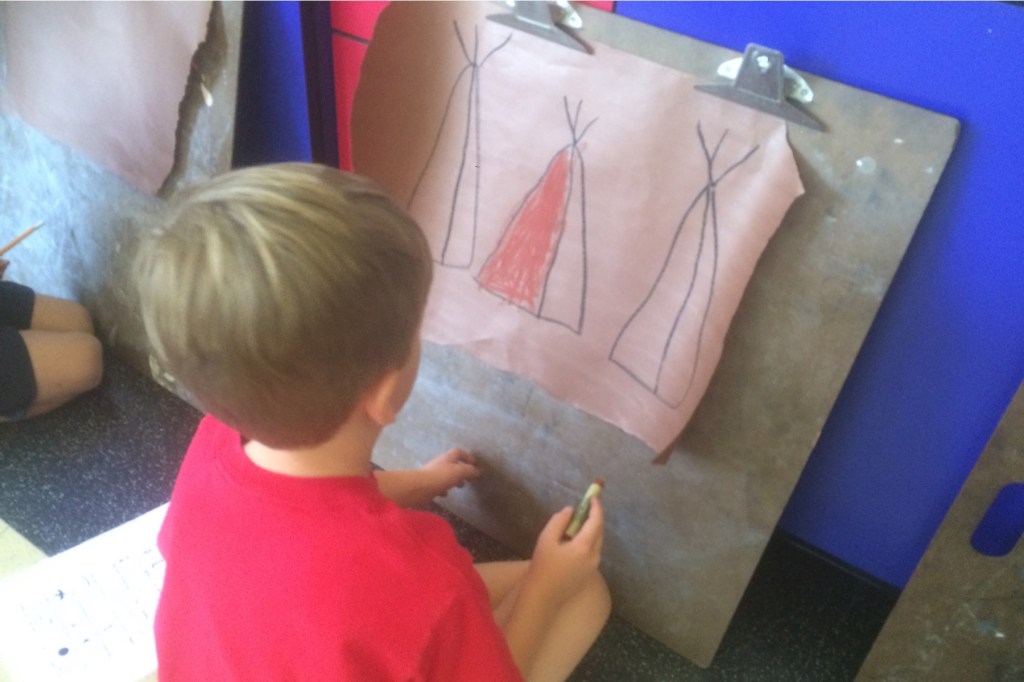
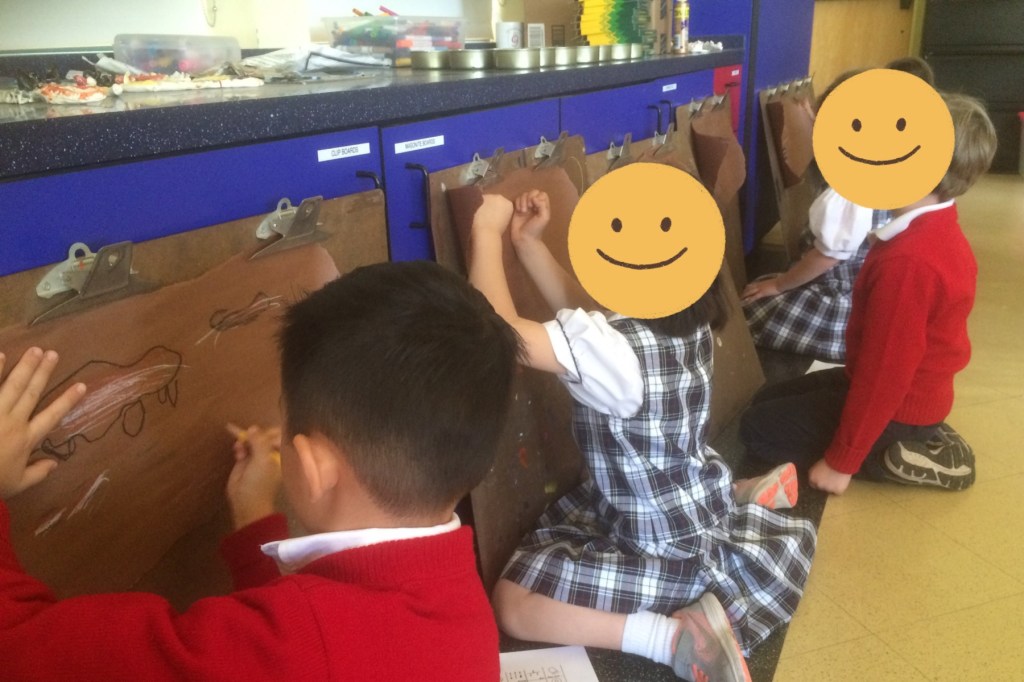
Once the class got a good idea of the materials and the subject of cave paintings, they would begin to make their own! I try my best to make this part of the project fun and creative. Some years I would take a big piece of butcher paper to the walls. In my most ambitious year, I used cardboard boxes to make caves for the kindergartners to immerse themselves in the activity. In the images below, I used Masonite boards to click a piece of brown butcher paper and angled them along the cabinets of my room. For this activity, you can used chalk pastels in neutral colors to mimic cave paintings or you can take it a step further and bring in some natural materials that a cave person had access to. How far you want to take this project is up to you.
Materials:
- Brown butcher paper/construction paper/cardboard boxes
- Coloring materials (chalk or oil pastels work great but you can also go authentic and bring in coal, clay, mud, berries, etc)
- Masonite boards (optional: can easily tape the paper to a wall as well)

I usually keep artwork until the end of the year for the art show, however, for this activity, I would let the kidneys take their work that day for many of them were excited about the process and wanted to share their work at home. If doing this with butcher paper, it was easy to do this. If using cardboard boxes, you may need to take time to cut specific sections or take photos to send home. In the end, the activity is a fun way to show students what it was like to be an early artist and to get their hands dirty.
As an Amazon associated, I receive a percentage of items purchased through my links.
