

Around second grade, I begin to introduce symmetry to my students. I begin with bilateral symmetry (mirror symmetry that is right down the middle) and as they get older, add other aspects of the topic such as radial and asymmetry.
I like to begin this project by first asking for examples of symmetry they see in their day to day life. Usually around this age they would have heard the word or gone over the concept in math. If not, going over the definition will help with them coming up with examples. Some of the popular examples I have heard over the years are,
- Butterflies
- Hearts
- Happy faces
- People

I found it helpful to also go over examples of images that are not symmetrical. One that always confuses some students is a lightning bolt. This is because it has symmetrical qualities, but isn’t exactly symmetrical. By showing this example, I am able to discuss the aspects of symmetry even further.

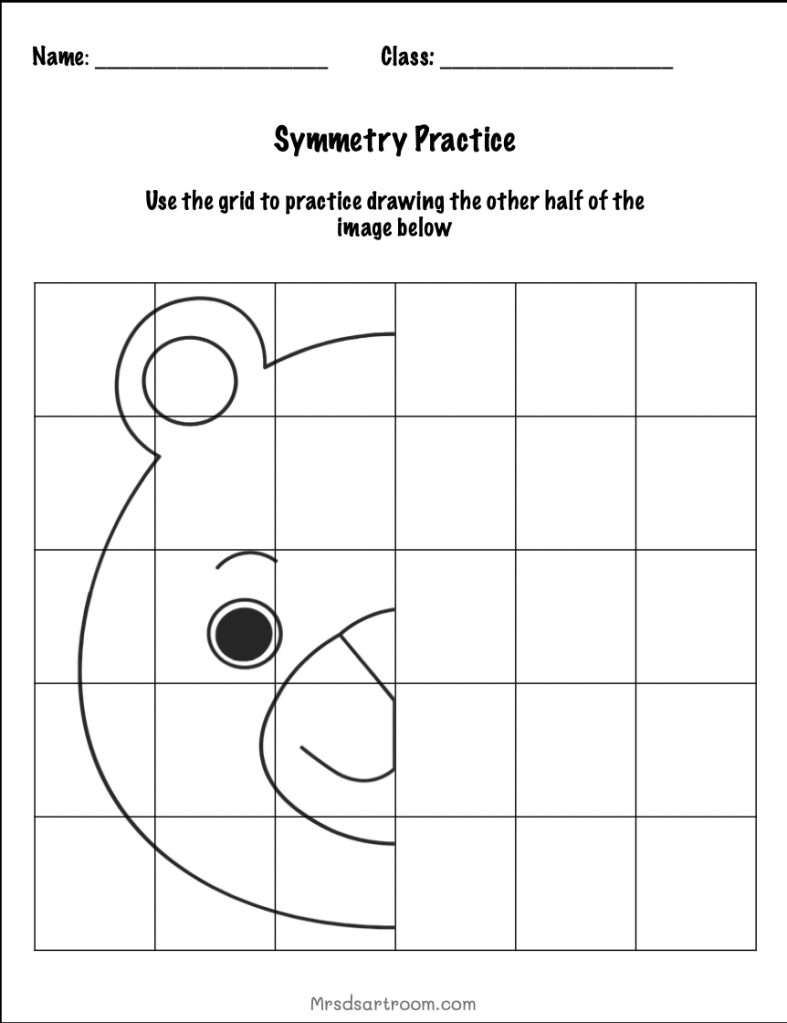
Pre-activity
To get the class started with symmetrical lines kinesthetically, I have provided a symmetry practice worksheet. This can work with all ages, but recommend second grade and up. I have found this is also helpful for older students too because it helps them mentally understand symmetry through practice instead of just looking and discussing examples. You can also download this resource or other resources from my Teachers Pay Teachers page
Project
The best thing about this project is that you can adapt it to different subjects so that you can be changing the artwork yearly, but keeping the same topic. In this post, I did hearts for Valentines Day, but I have also done jack-o-lanterns, butterflies, etc.
Materials
- White paper
- black paint/ black glue
- watercolors
- bottles (if not using black glue)
Steps
- After introducing symmetry, demonstrate the project with your students
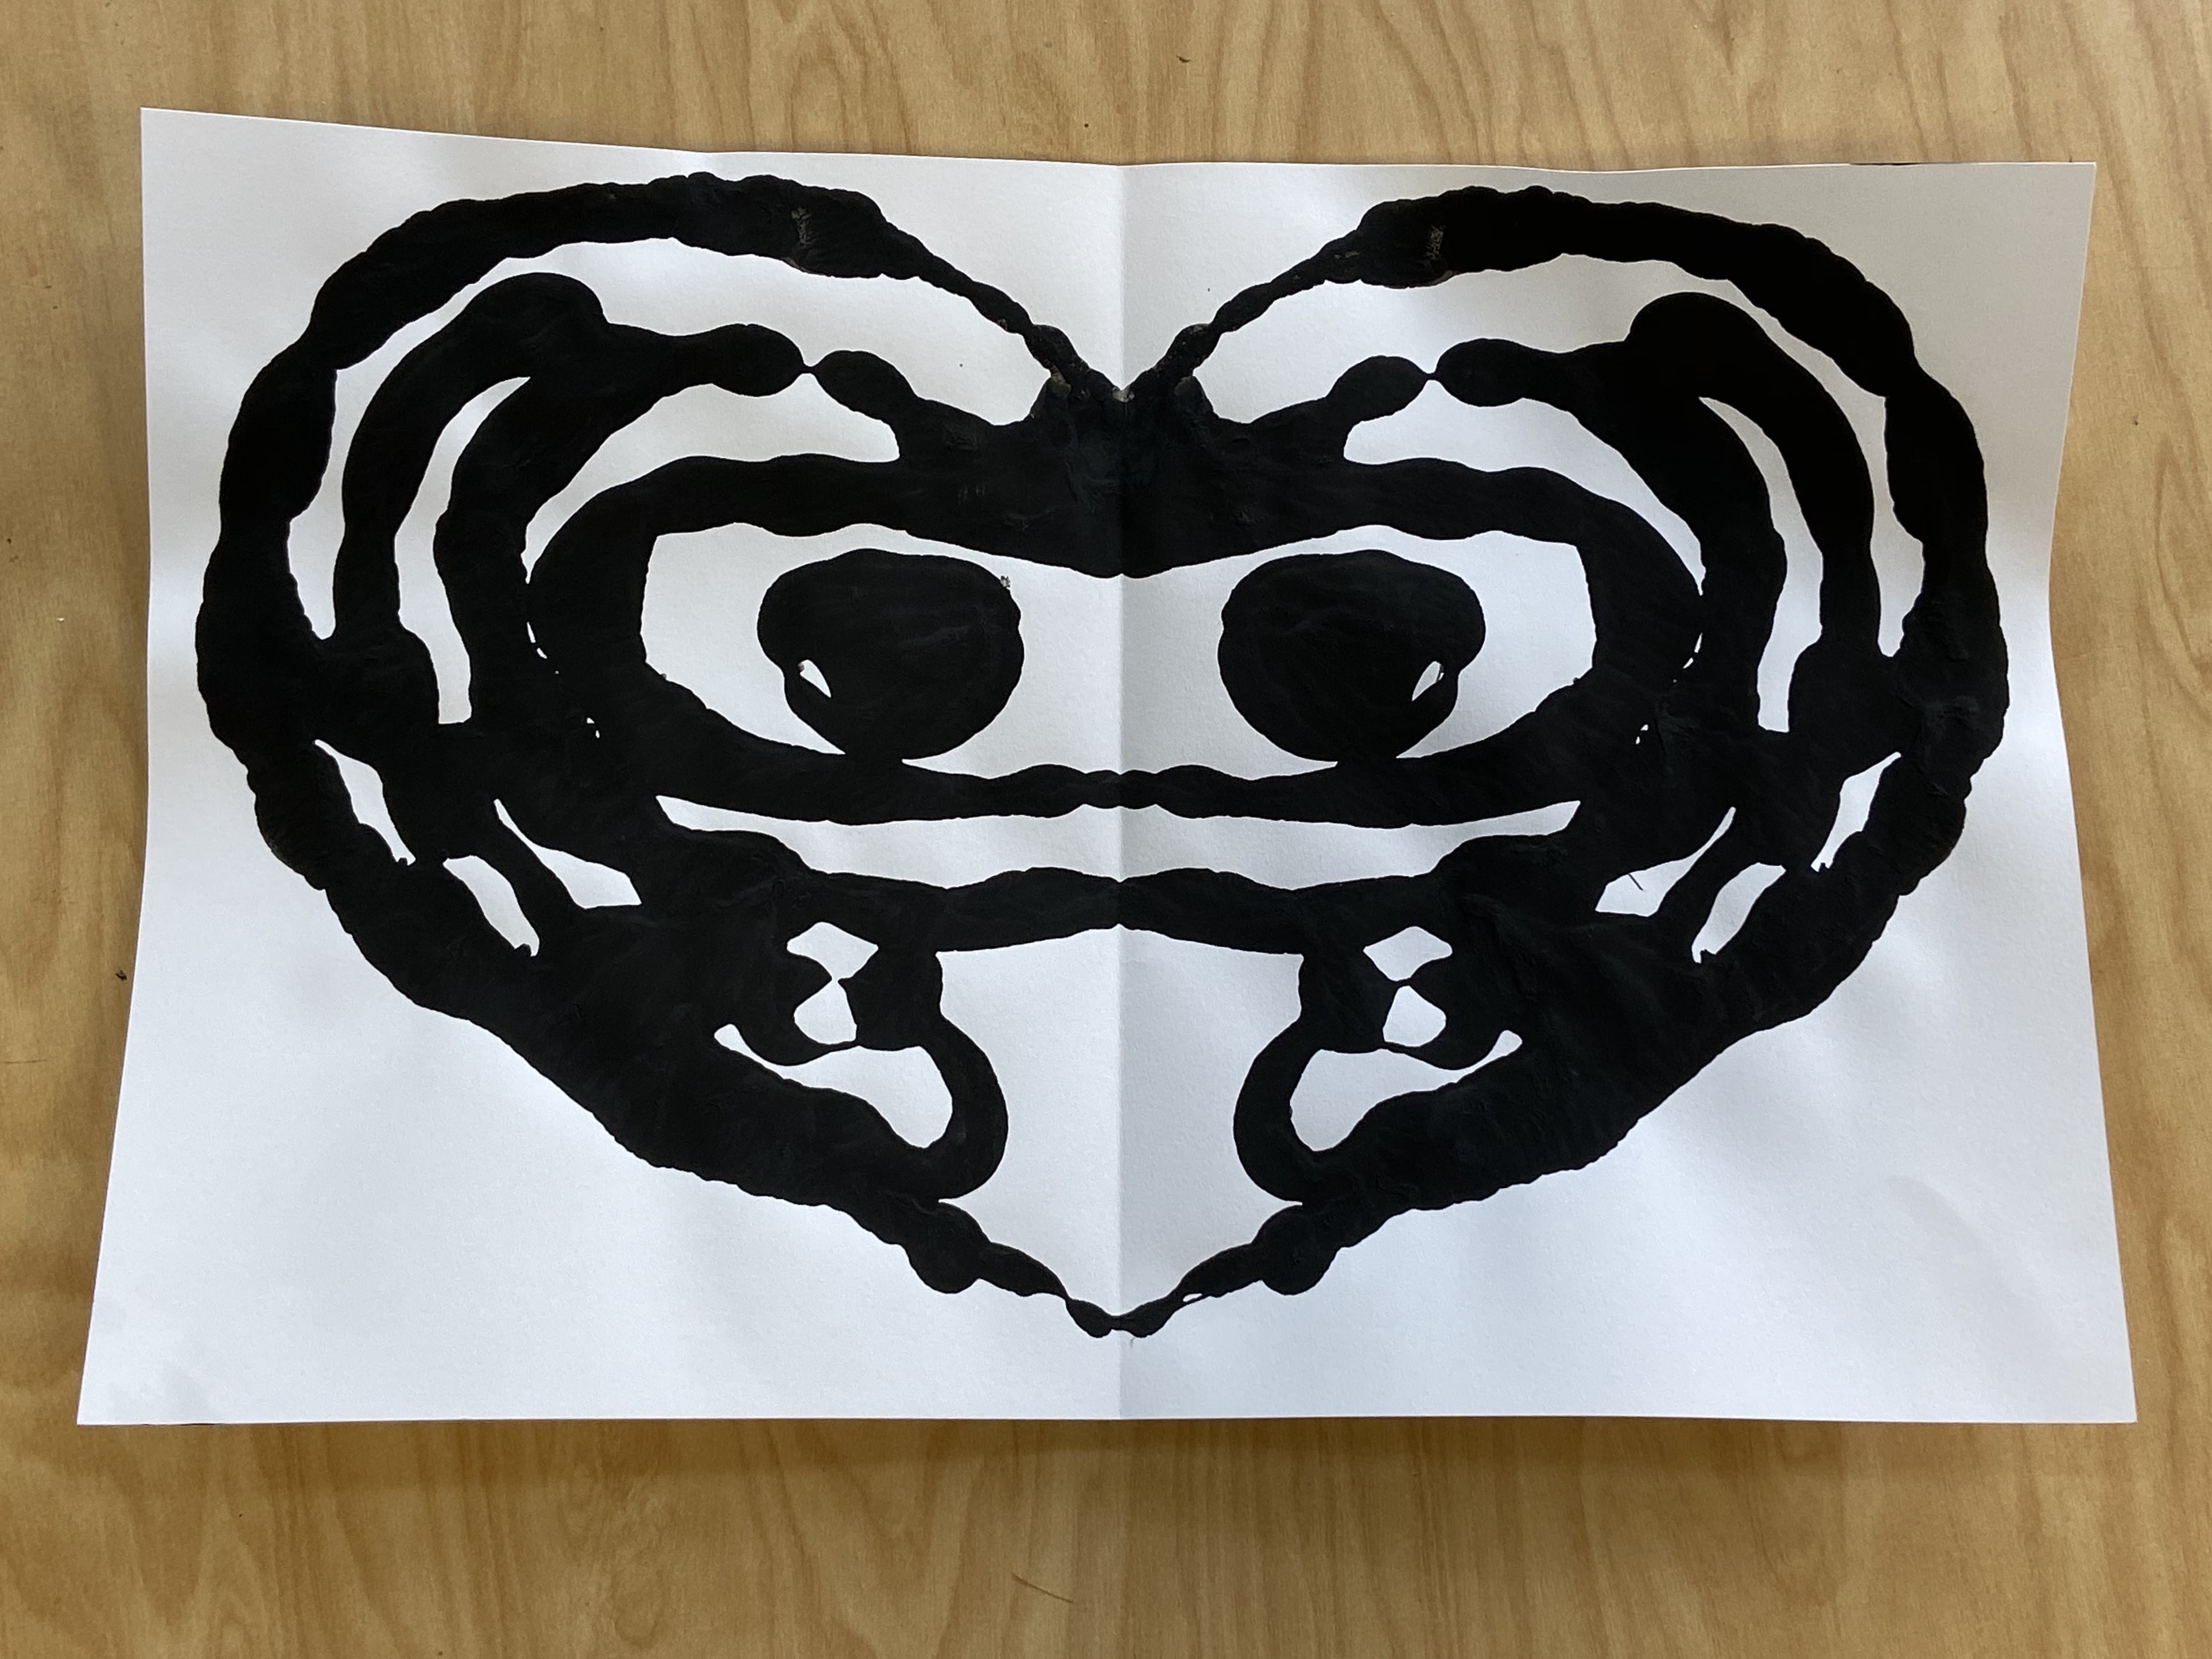
- fold a piece of white paper in half. I normally do this for the students so that they get a true lime down the middle for a guide.
- Open the paper and draw half of your image one one side of the paper, being sure to finish the image on the line going down the middle. It is good practice to have them use pencil first so they can fix any mistakes prior to the paint/glue part.
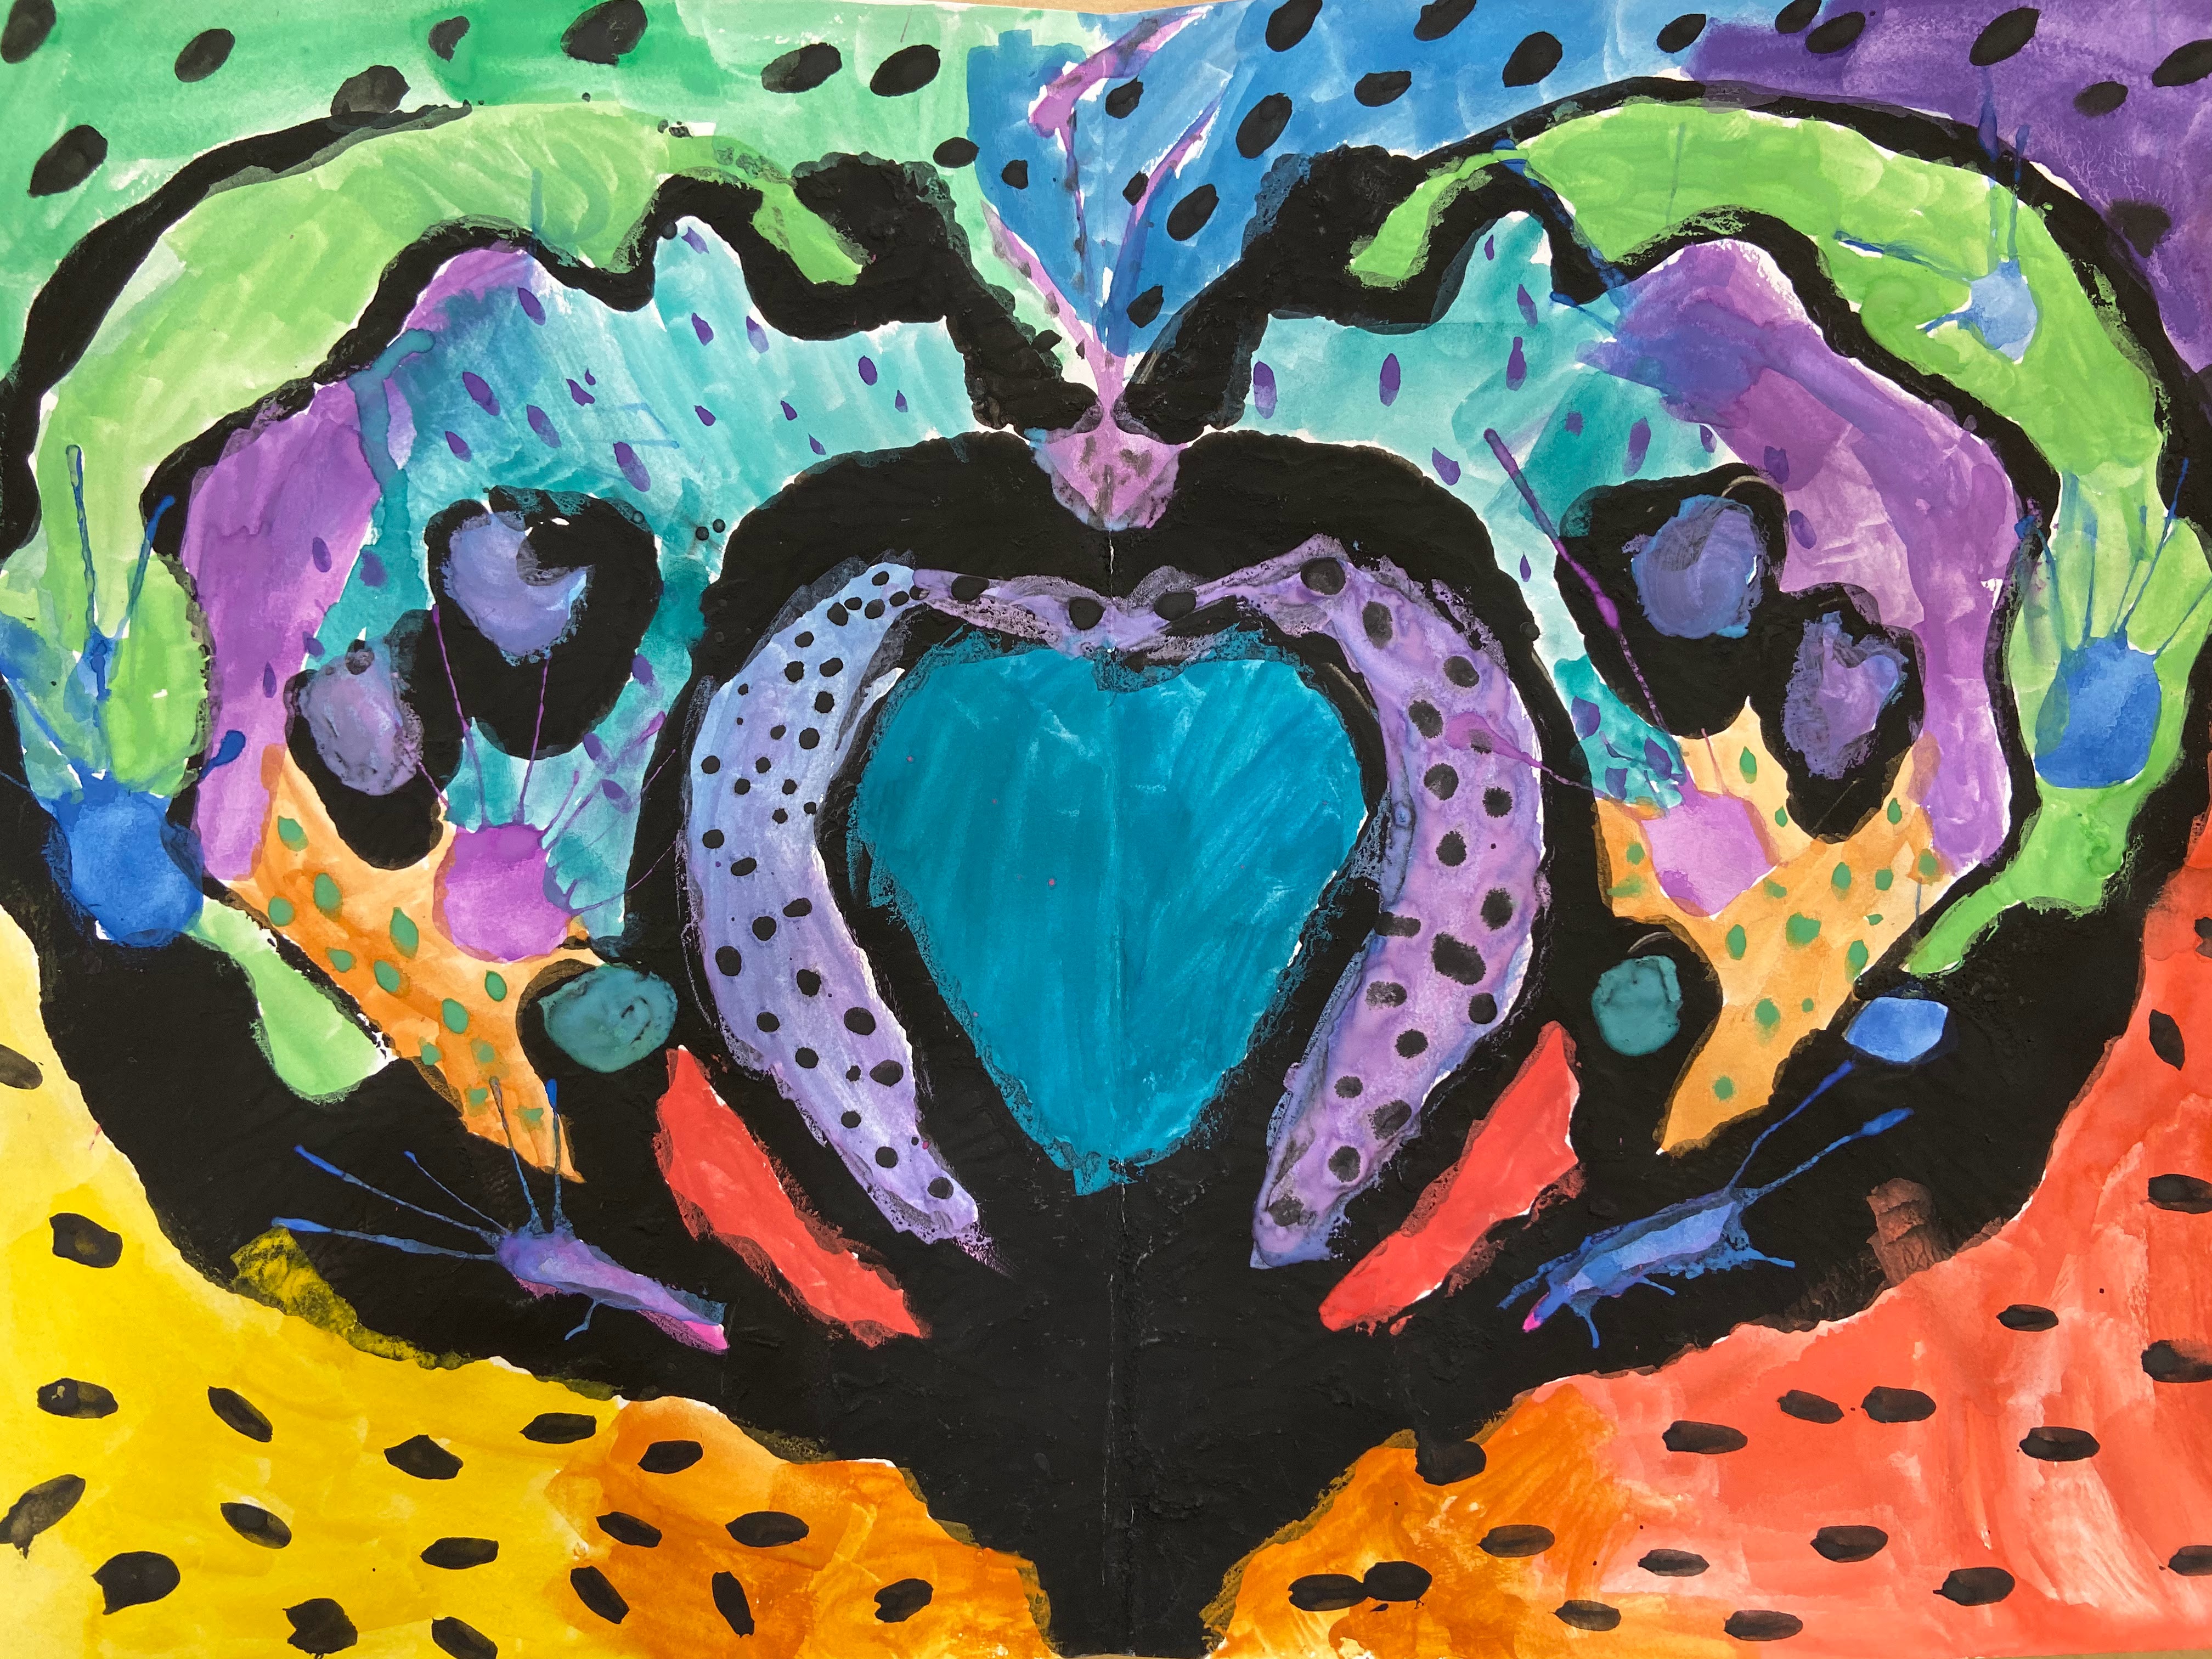
- Adding details is important because the more you have to add, the more spaces you have to color (see finished example below.
- Once they completed their final pencil drawing, they can begin adding the black glue or paint. If you have the resources, I recommend the black glue because it saves time and effort. If you have a more strict budget, black paint works just as well, but it is important that you put it in squeeze bottles so that students with less motor skill development can handle outlining their pencil drawing.
- Outline the pencil drawing being careful to cover the pencil. It will be difficult to erase and visible pencil marks.
- Symmetry Concept: fold the piece of paper in half and lightly press the two sides together. Quickly open so that the paint/glue do not start to dry and do not press too hard or the lines will become more like blobs. When opened, you will have a completed heart, butterfly, jack-o-lantern, etc.
- Leave artwork to dry (normally will have themcontinue the next class)
- Once their artwork is dry, they will then use watercolor to add color to their artwork, Having more details when they design the first half will give the, more areas to color for the final artwork. Colors should be the same on both sides to add to the symmetry concept, however, some variation is ok like in the example below.
Conclusion
After you introduce symmetry, you can then begin to add variations of the concepts as students move on to older grades. You can read my other posts on radial symmetry and asymmetry. Again, this project is easily adaptable to different subjects to fit your curriculum or school events to tie your artwork to your students life.
