This is one of my favorite projects for many reasons. One, they come out very unique and can push the creativity of individuals. Two, it involves many different skills and subjects making it a more bang for your buck kind of project. I usually finish this project with playing cards because I can pick up a few packs at the dollar store; but I have also done this with comic book covers, so there are different ways to change up the project to fit your students, children, or yourself as a teacher.
Pablo Picasso Introduction
To start the lesson, I introduce Pablo Picasso or go over a refresher if I had done a project with him as inspiration before. This activity I usually do with 7th grade or up so it is likely they have heard of the artist before. I will still give a brief summary of him as well as dive deeper on the topic of Cubism, since they will be using cubist skills for this project. Some things I like to focus on are
- That he began making realistic art and became more and more abstract as he got older
- Pablo Picasso and George Braque were the co-creators of cubism (Braque is usually left out of the credit)
- Discuss the different levels of abstraction and look at several examples of Picasso’s work to see if we can make out the objects in his cubist artwork.
Grid and Scale Practice
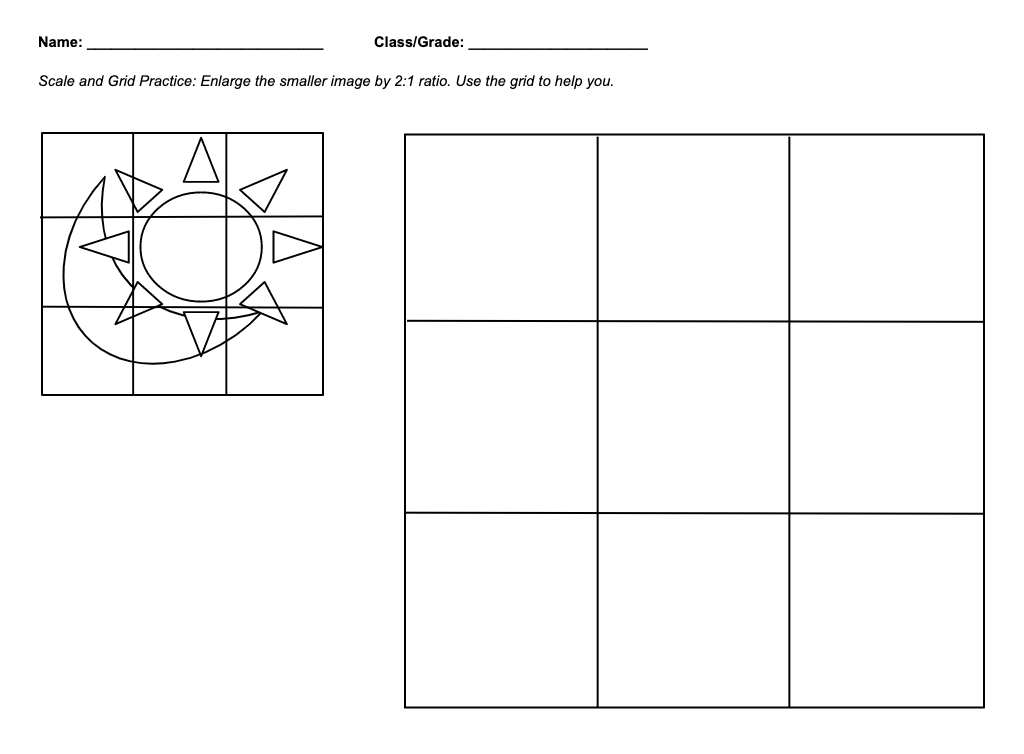
For this project, students will be making a smaller image out of face cards (or whatever item/subject you choose), making a grid on their cutout artwork, and then making a larger grid at an even ratio to enlarge it. For example, if their cutout artwork is 3×4, then you can enlarge it by 3 and their final artwork will be 9×12. I usually give them a simple practice sheet to get them started for it can be a hard concept to grasp through verbal or visual examples. I find that kinesthetic applications work best. I have provided a free download of a 2:1 grid practice sheet. Others can be found with a quick google search, but I think simple shapes with no shading or color helps more.
Cubist Playing Card Project
Once your students/children have completed the grid practice, they can start on creating the smaller image for their enlarged drawing.
Materials
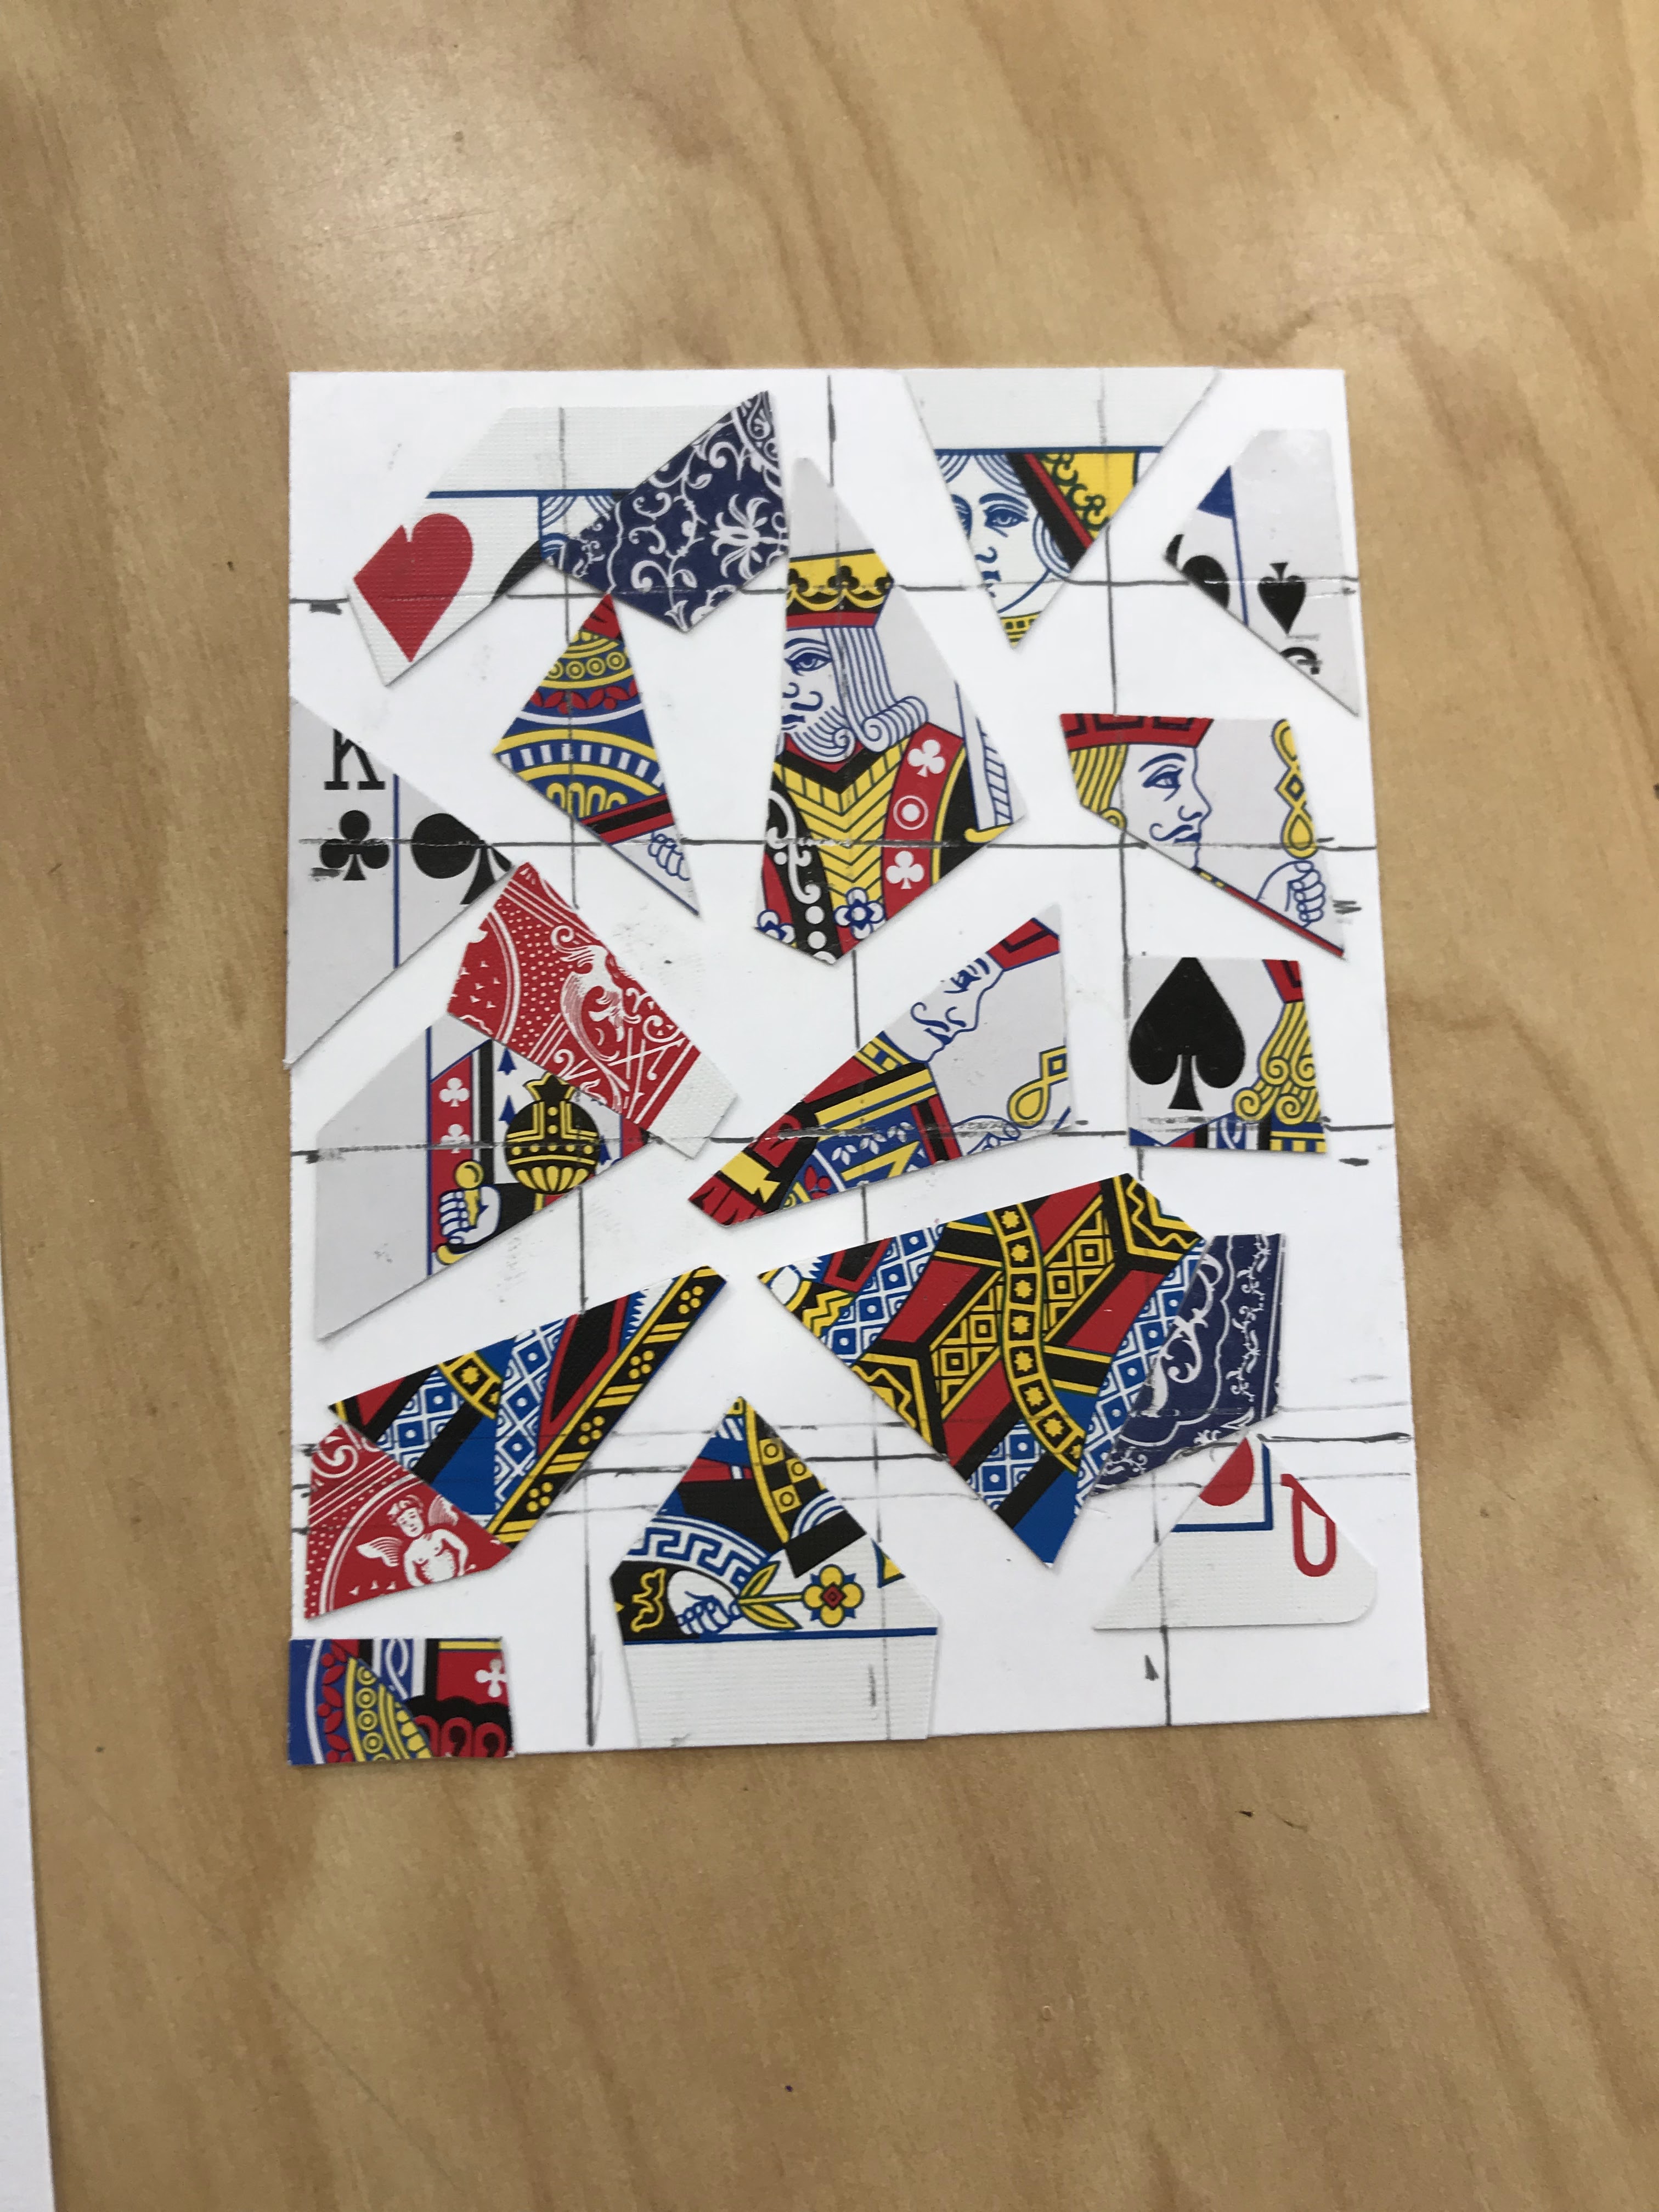
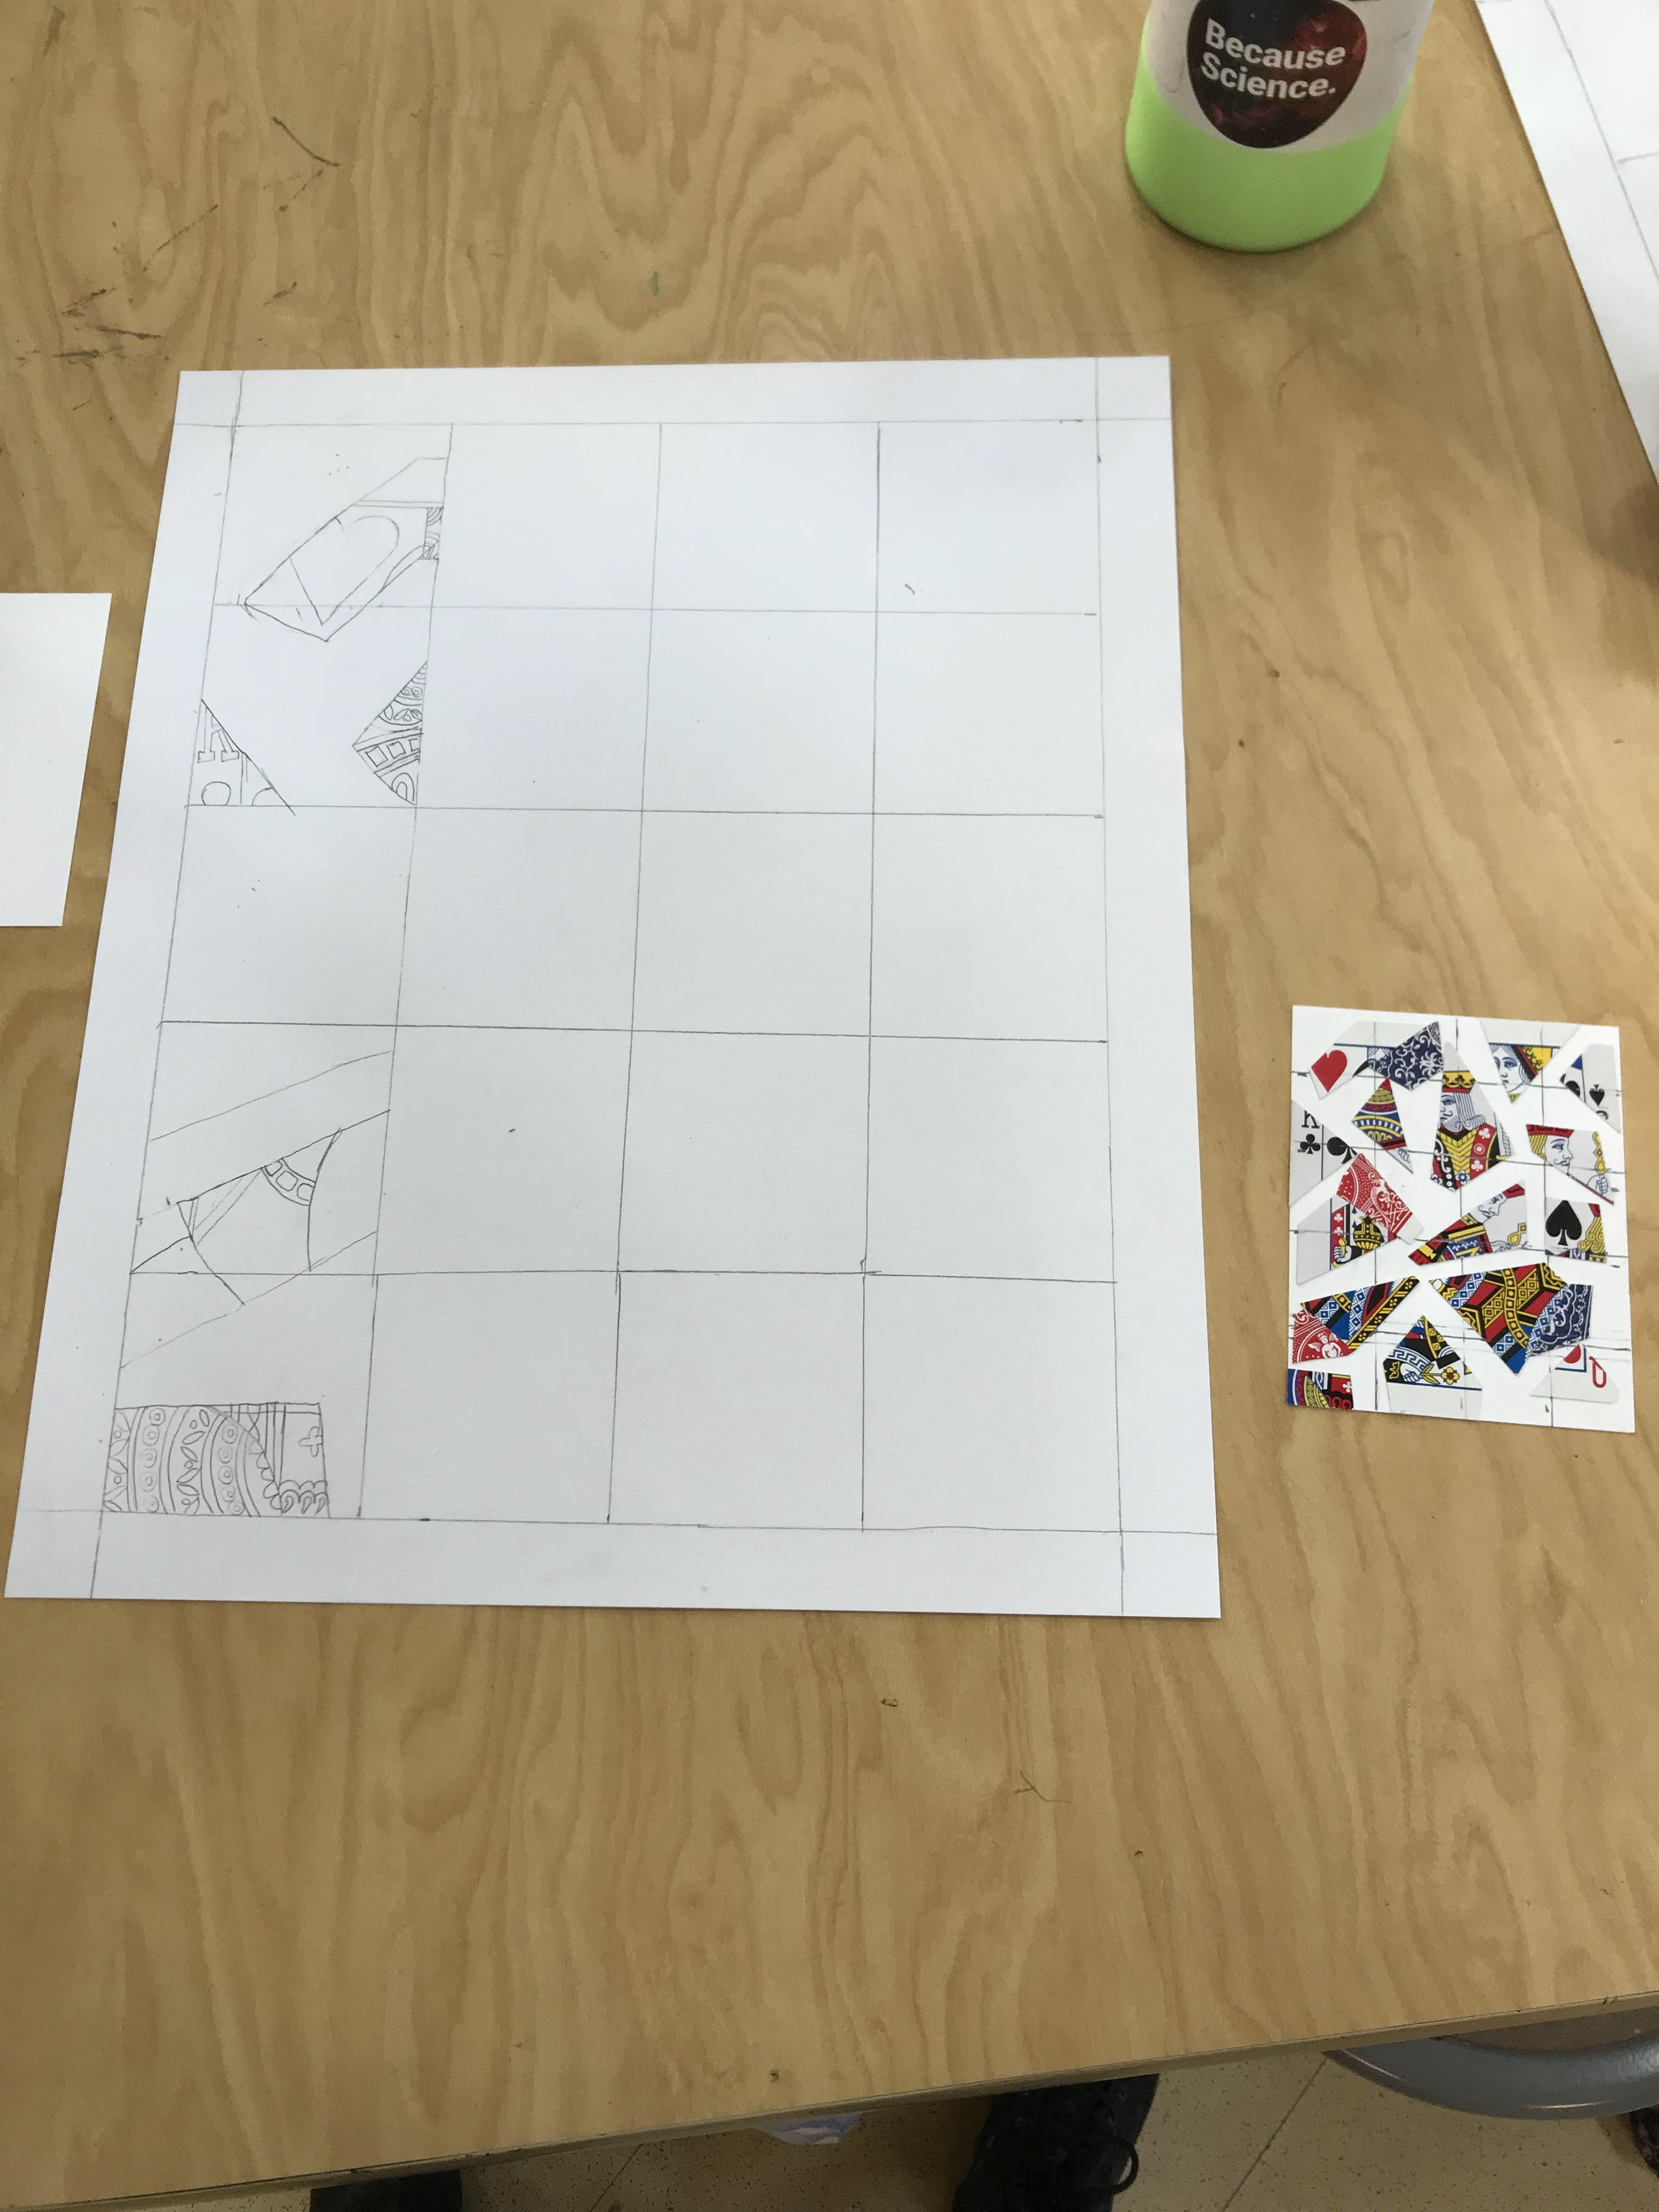
- A small piece of card stock or index card to glue cut up images on (see example below) Whatever the size of this card, you will need to enlarge it by 3
- Face playing cards and numbered cards (I usually give 2-3 face cards and then let them use how many numbered cards they like. This link is for a 12 pack, which will give you 144 face cards to be divided among the number of students you have)
- Scissors or exacto knives (exacto knives depending on the age and responsibility of the students: use cardboard to protect tables when cutting)
- Glue stick or glue (glue sticks works best but can easily flick off. Be sure to keep in a zip lock if you use sticks)
- Ultra fine tip sharpie
- Pencil / Pen
- Ruler
- Sandwich bags (to hold any extra pieces and to keep the card safe from any pieces falling off, which they will)
As an Amazon Associate I earn from qualifying purchases
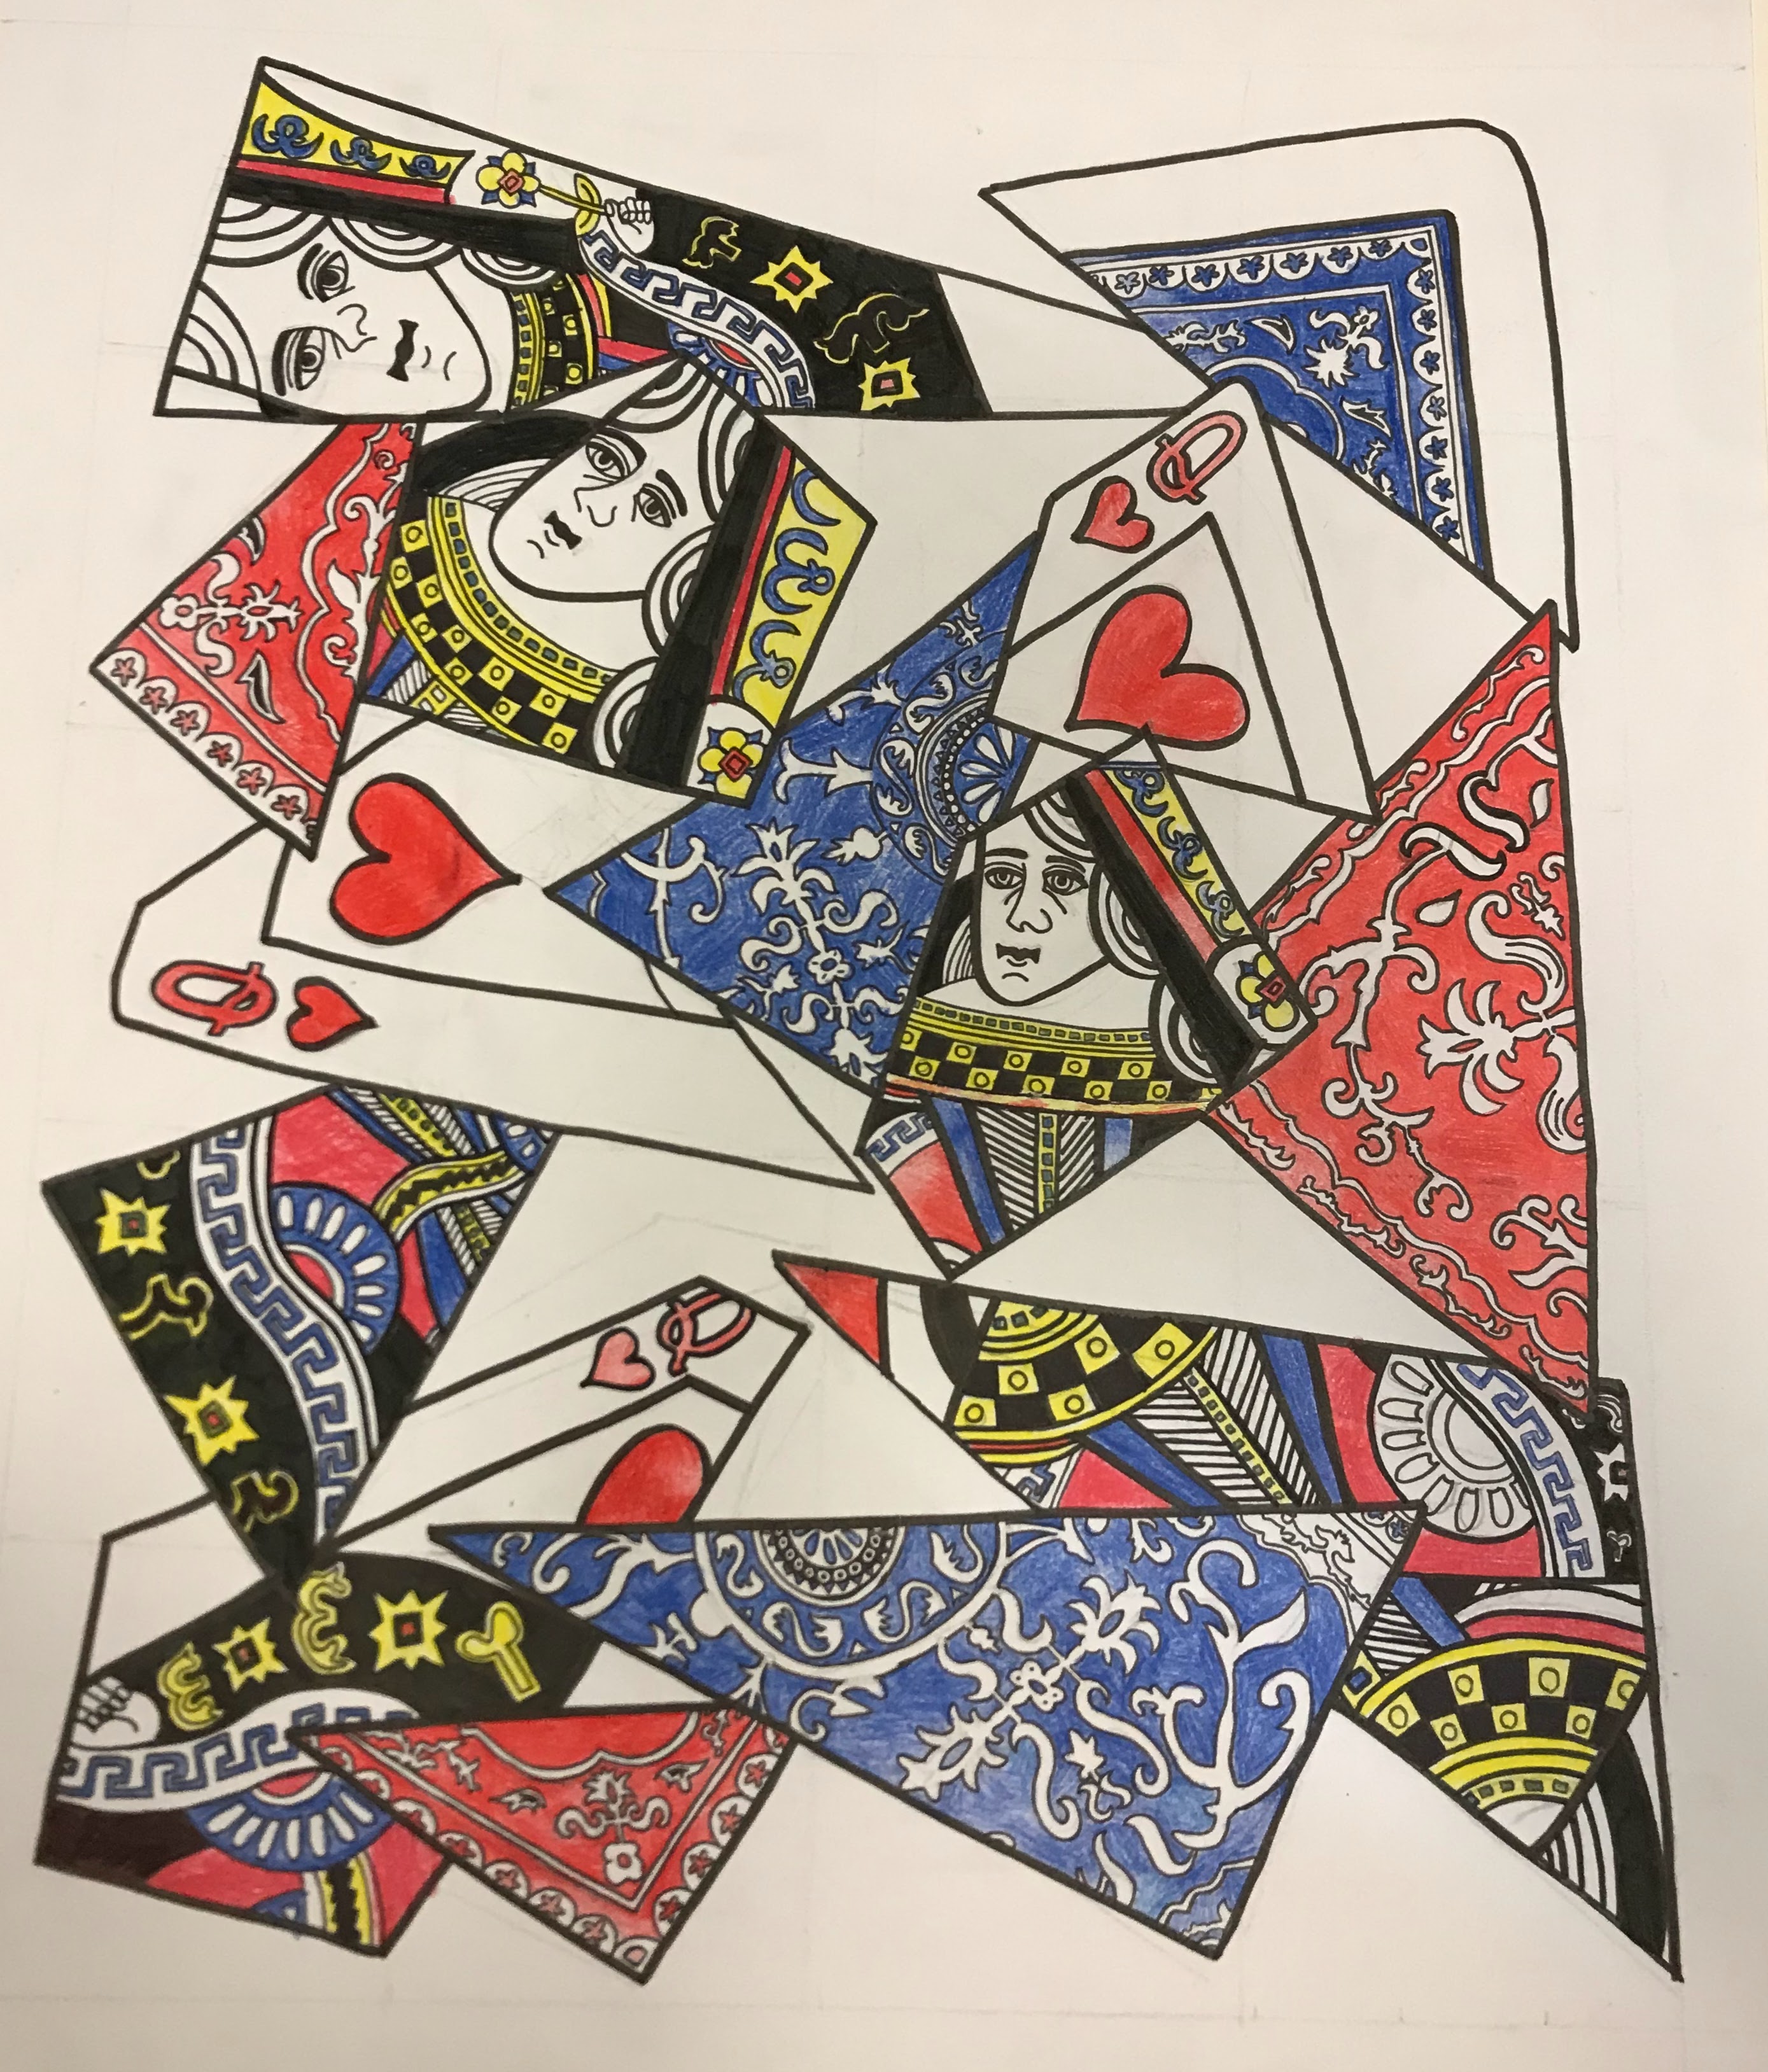
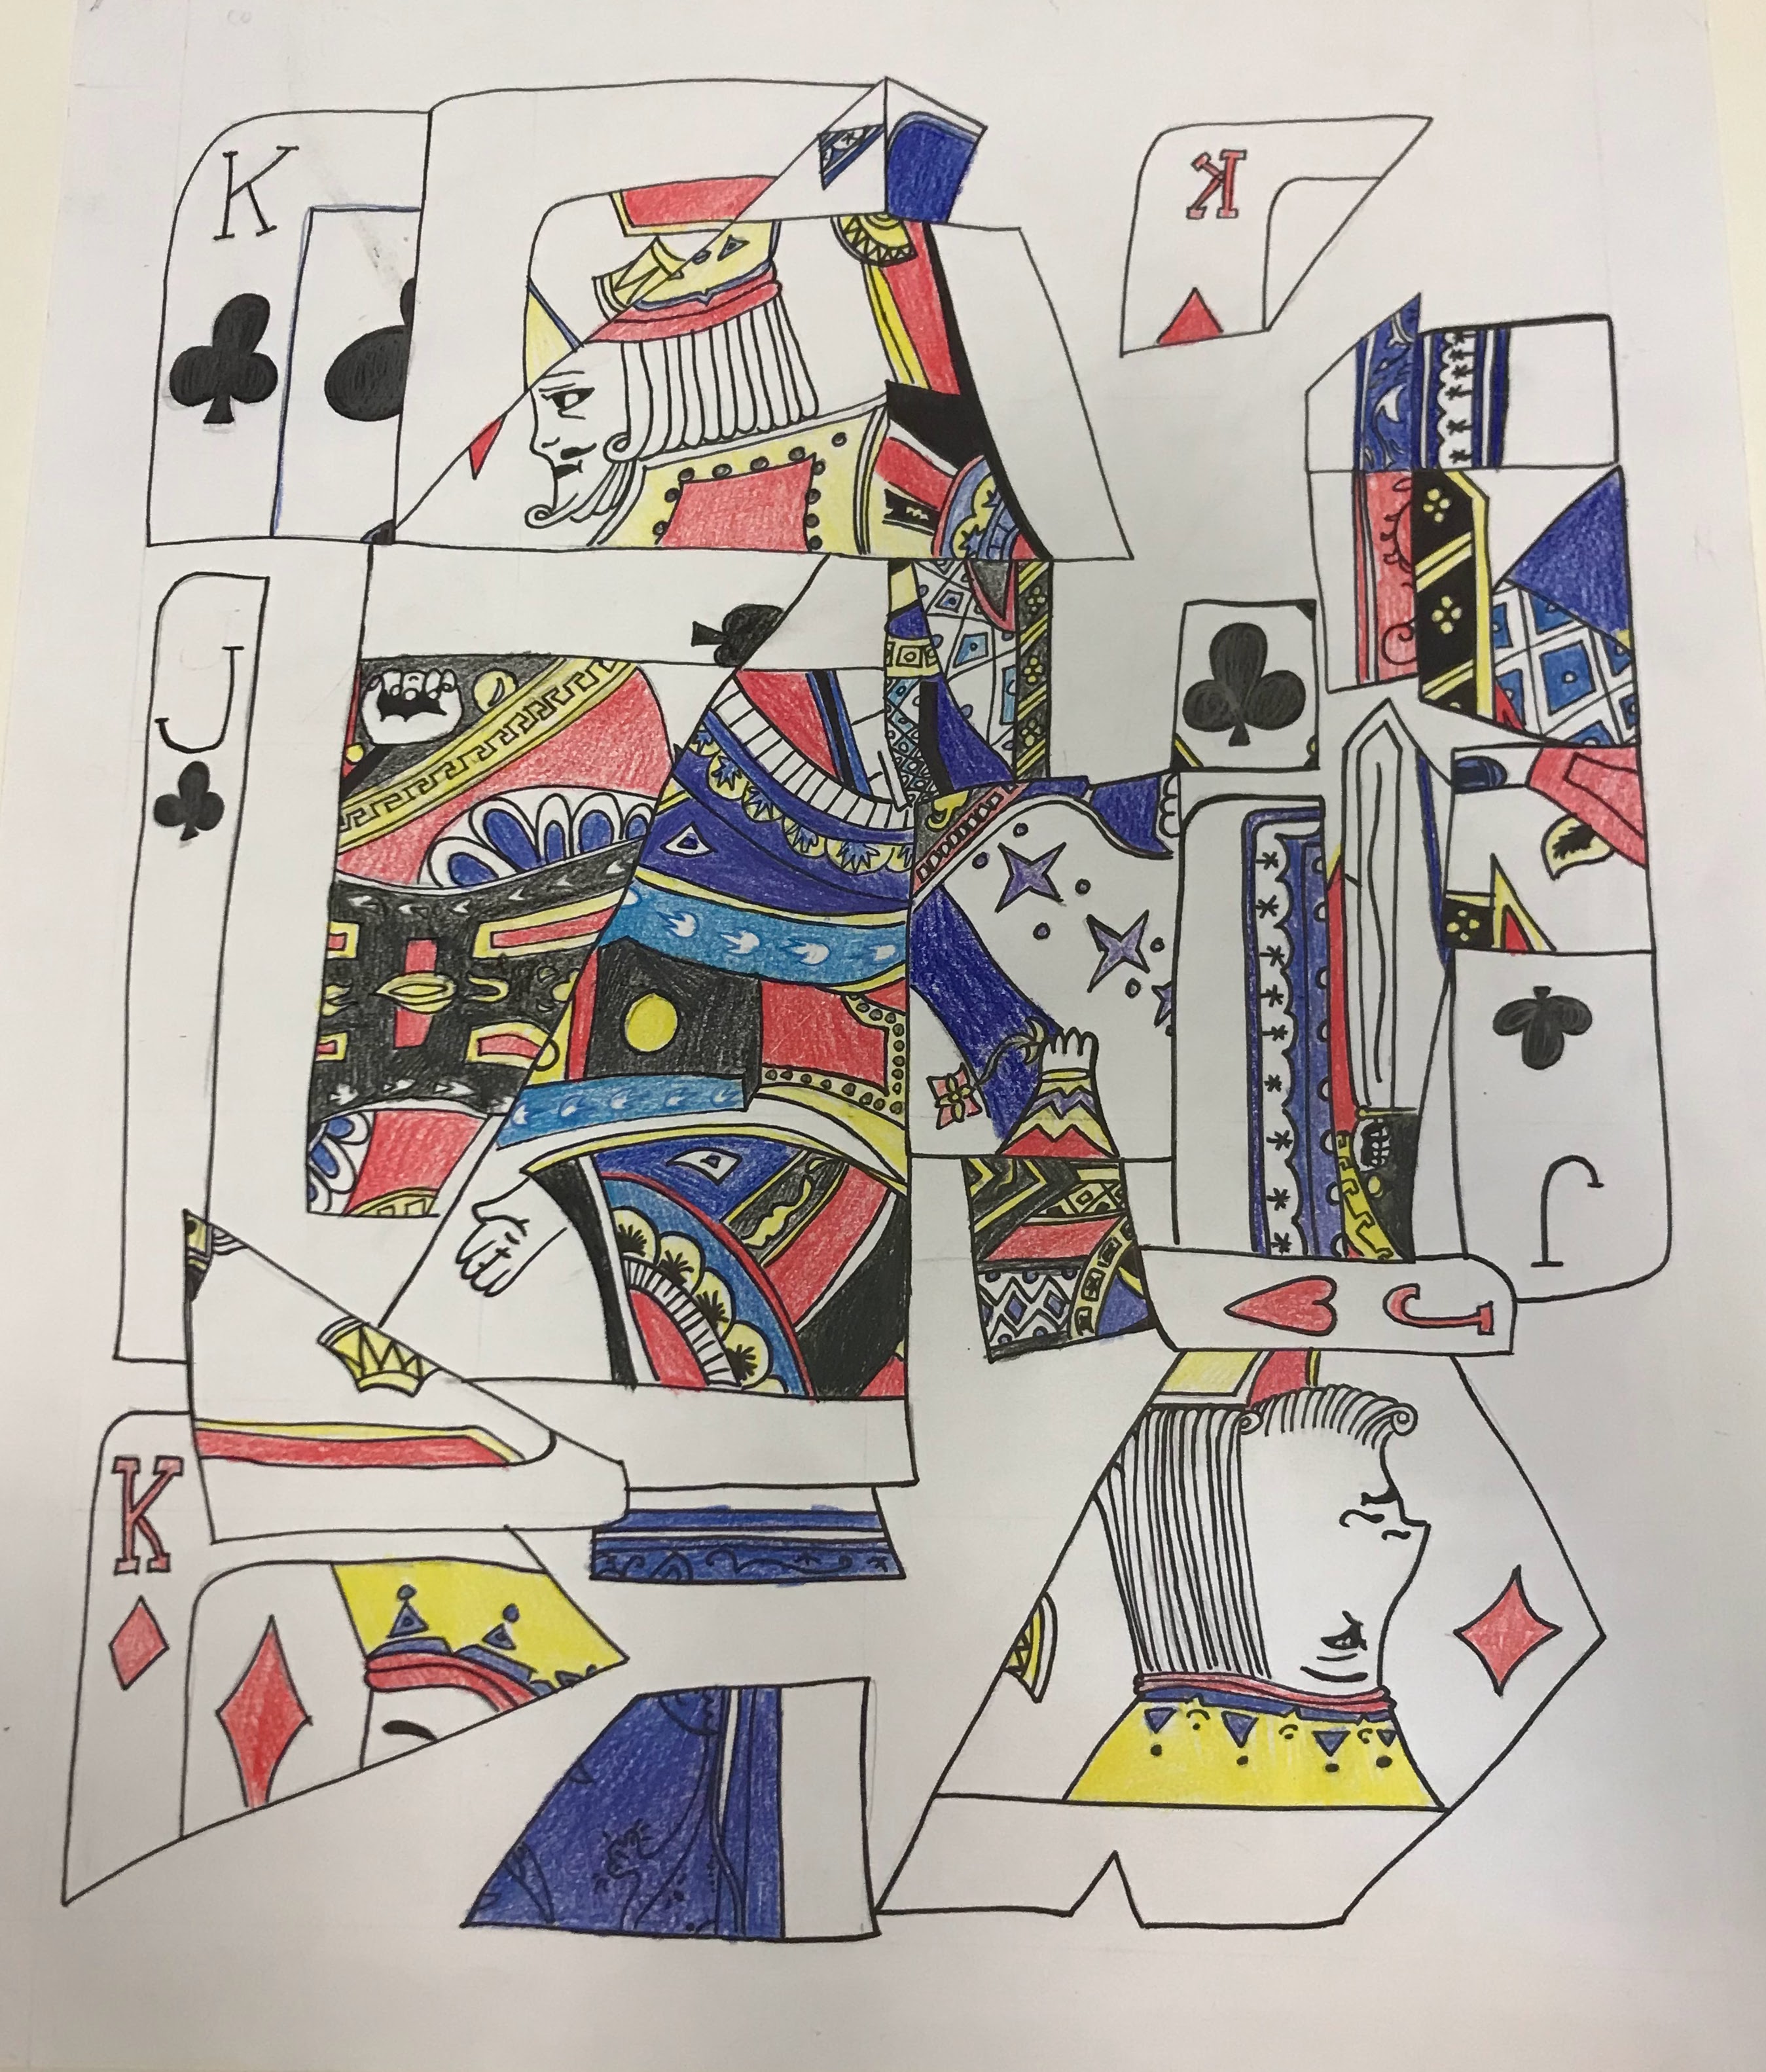
- Students / Children will cut up their face cards or numbered cards and arrange the pieces in a cubist way. This doesn’t have to be too difficult as long as they do their best to fill up the space and use some faces in their work.
- Once their little artwork is finished, they will create a grid of one inch by one inch. So in the example below, the card was 4×5 giving the students 20 one inch boxes for their grid.
- They will then create a grid on a larger piece of paper 3 times larger than their smaller one. In this example, the paper was 12×15 inches. The grid will be 3 inch by 3 inch squares. Be sure to use a ruler on this step and to draw light for they will be erasing the lines and uneven lines will create an uneven drawing. (If your paper is larger than a ruler, I suggest getting 18 inch rulers or yard sticks)
- When both papers have their completed grids, the students can start transferring their smaller artwork to their larger drawings. My tip is to go square by square. Students should not be looking at the entire image but rather each individual square to help break down the work.
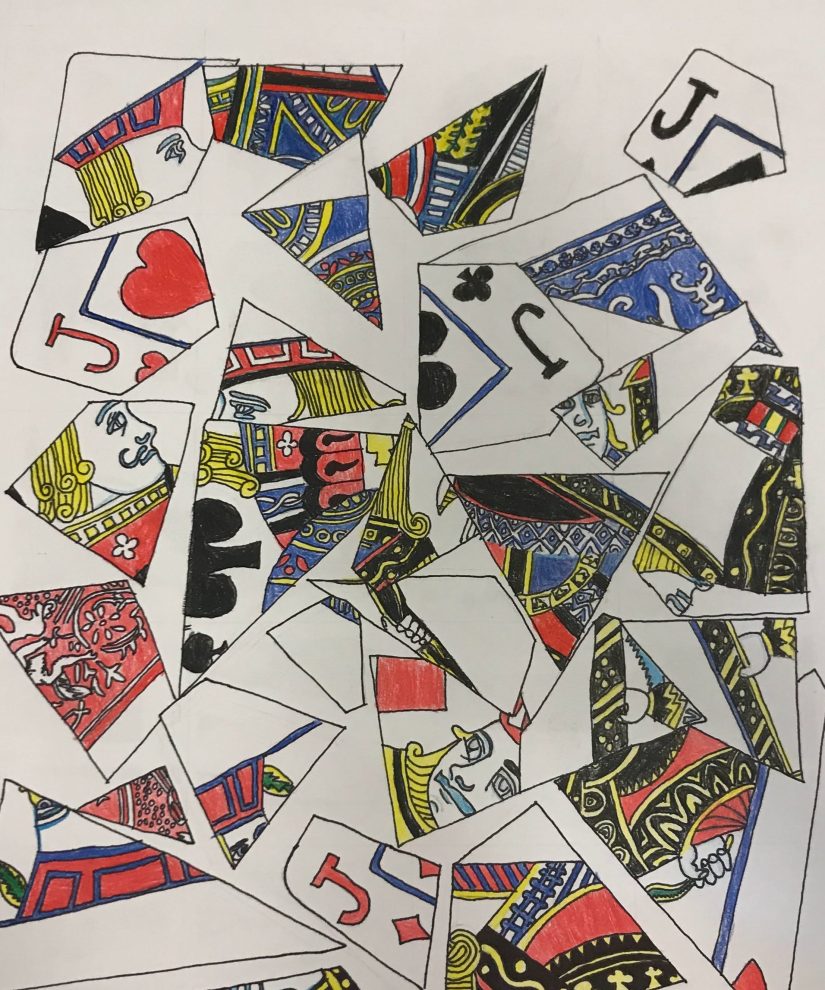
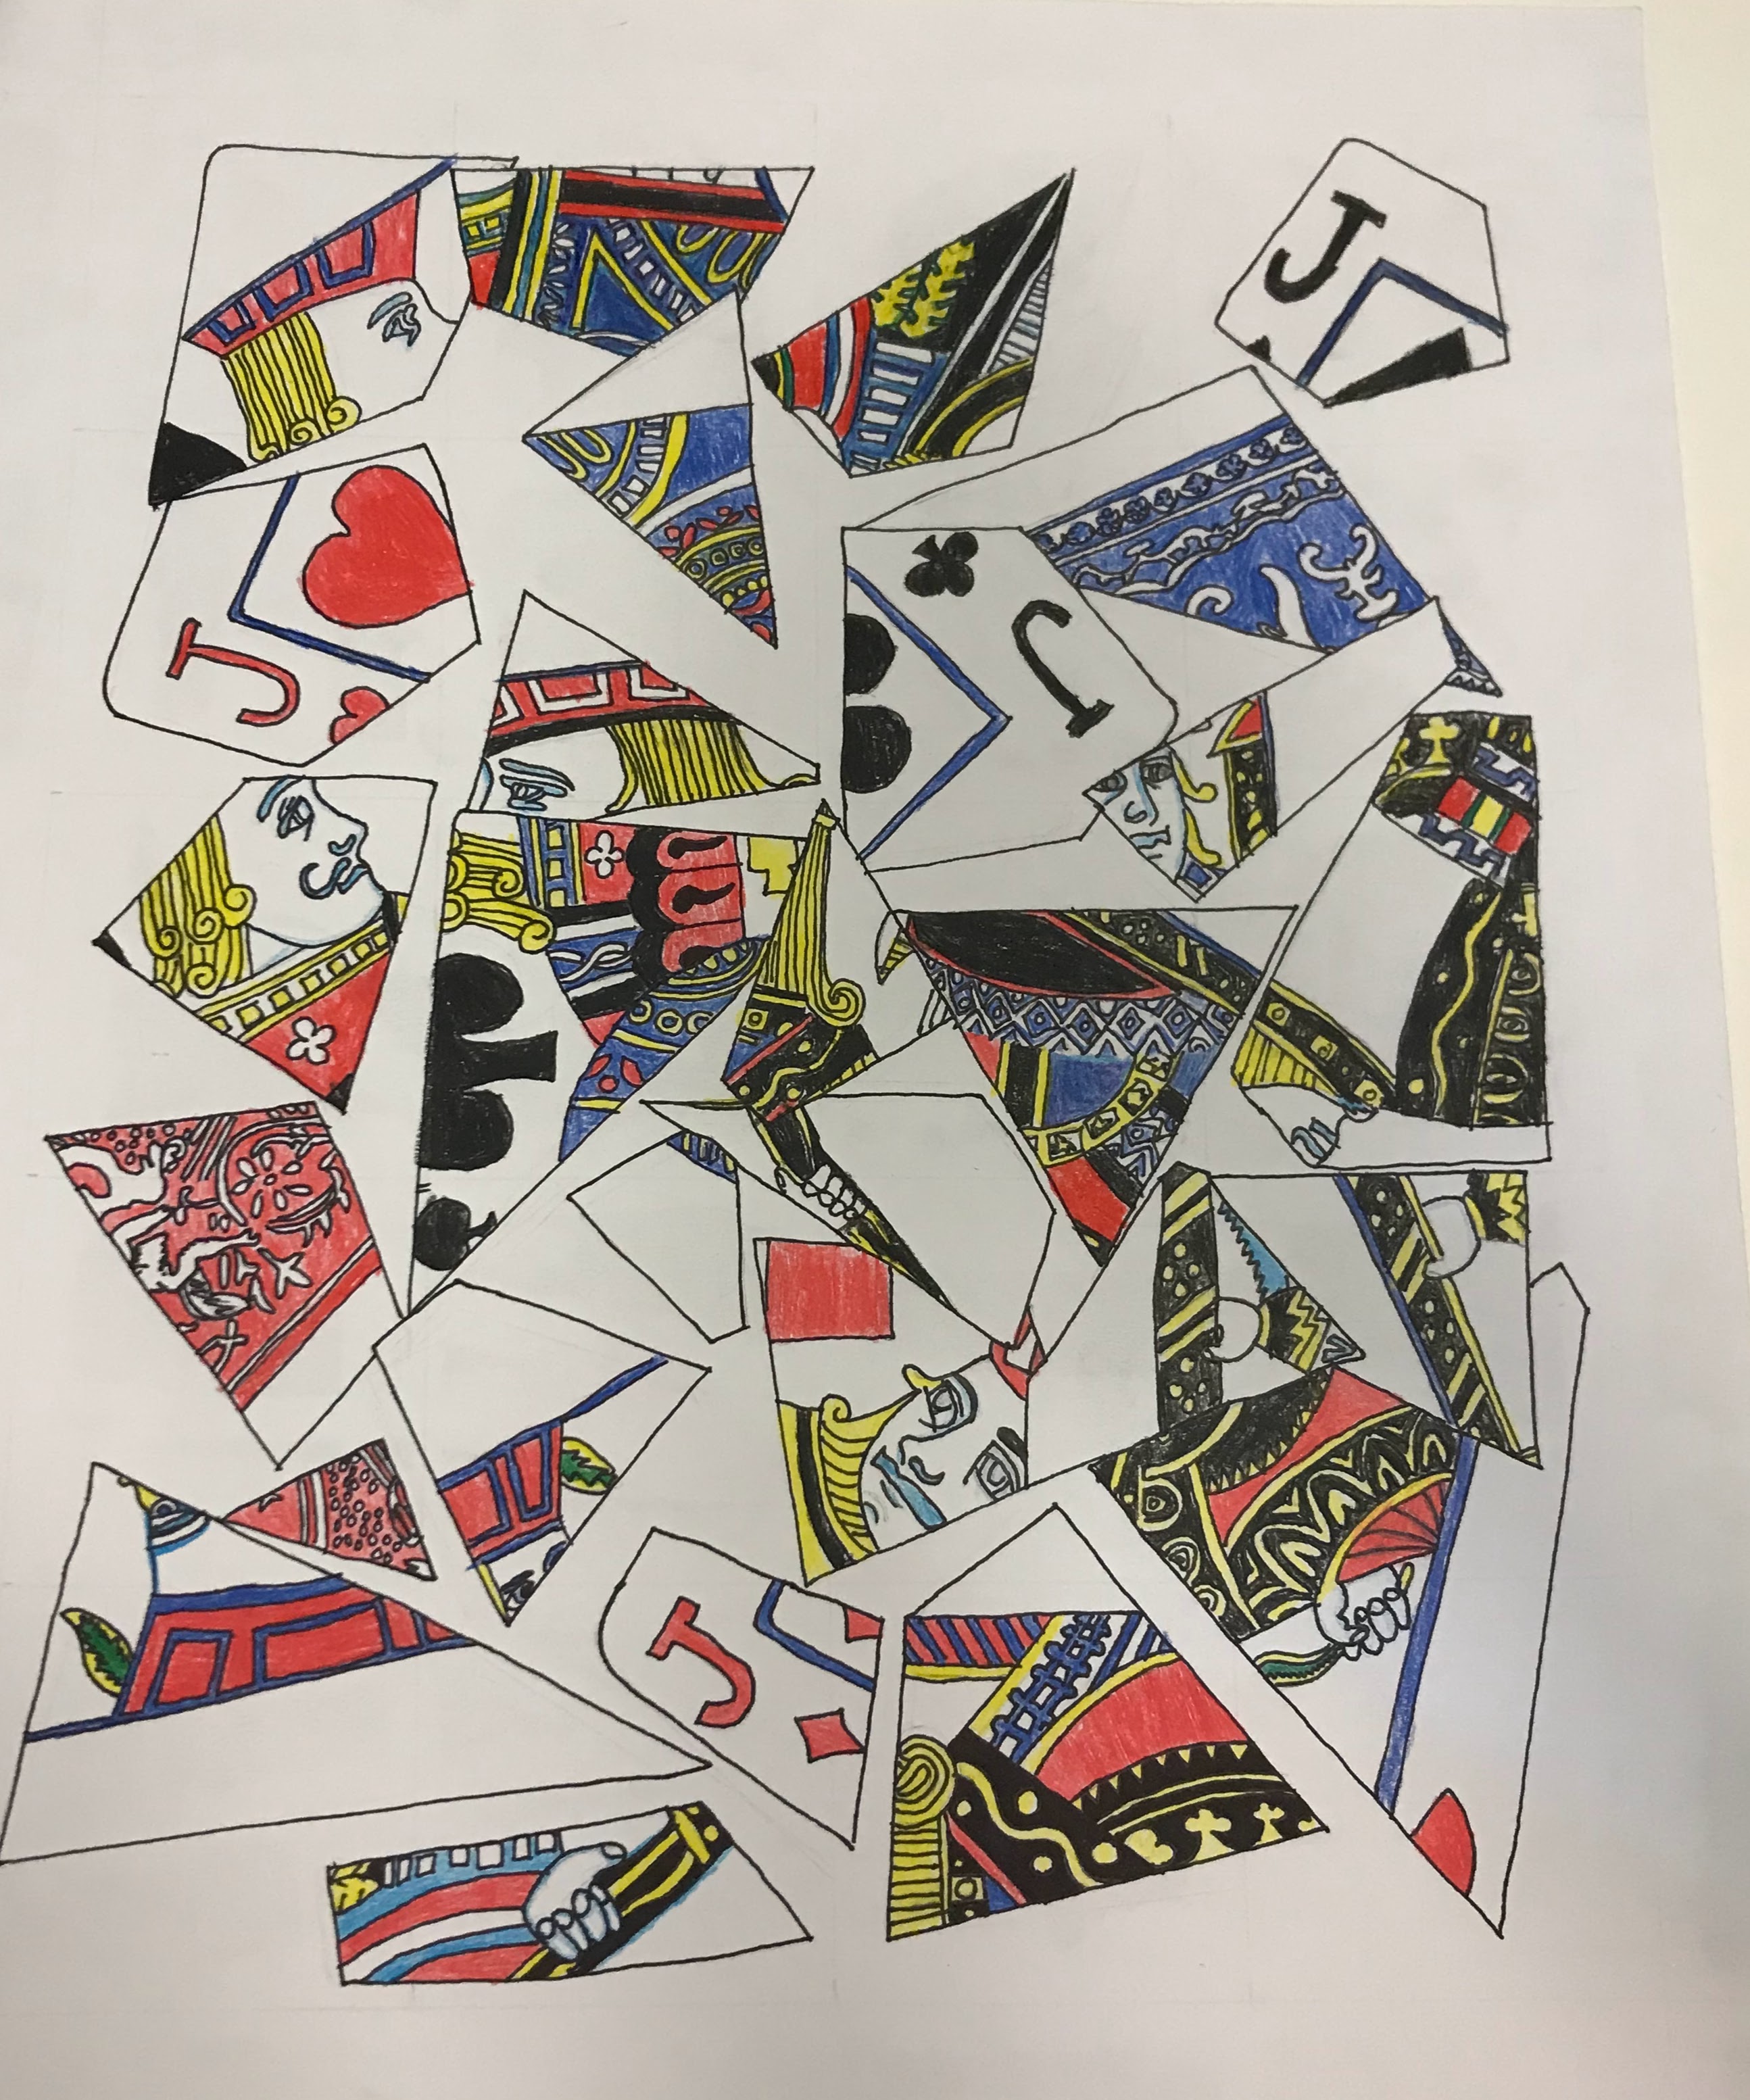
- When the drawing is finished, students will trace their drawing in sharpie.
- Erase the lines and add color. I say they can either stay true to the playing card or be creative with their color choices.
Again, the subject does not have to be playing cards. I have seen cubist art projects done with cereal boxes. I have done it with comic books like I said before. The main goal is to just give the students enough materials to push their ideas and come up with interesting designs. The final artworks do not have to be as large as I described. I found that it has a nice impact when displaying, especially when you keep the smaller initial image to show the scale and inspiration.